Showing posts with label seasonal. Show all posts

Wednesday, December 1, 2010

Winter Woodland Chandelier How To

Welcome to Day Three of our 'Tis the Season week of posts celebrating the holiday season with lots and lots of decorating ideas. We kicked off the week with a trend report of several holiday trends and today we're playing around with the Winter Woodland trend. Forests, and all they hold from animals to mushrooms, even just wood grains have been hot for the last year or so. Incorporating these elements into your holiday decorating is fun and SUPER easy to do. And if you're lucky enough to have access, many of the supplies can be found out of doors. Usually when I want to create something from natural materials I'll go outside and grab the stuff from the yard. But with a thick coat of white snow covering everything outside I looked inside for things on hand (birch branches) and then picked up a few things from the craft store too. The colors of this trend can vary, but again, white, red, and green seem to dominate. But instead of taking the shape of peppermint candies, the colors come in the form of berry sprigs, the silvery white of birch branches, the rich browns of pine cones, and the deep green of evergreens.

Today's how-to is just an example of how I might decorate with natural elements. I'm demonstrating how to decorate your chandelier, but knowing that many of you might not have a chandelier quite like mine, I want to assure you that you can take these same elements and create a vignette with them, or centerpiece for your table. These natural elements added to your wreath really make a beautiful and striking outdoor design as well. SO, take a look and then give it a try!

How To Give your Chandelier A Winter Woodland Make-Over for the Holidays
Tools and Materials:
4 birch branches about 15"long
Several smaller birch sticks
1 stem of artificial red berries
A handful of pinecones (varied sizes)
Bird's nest
Mixed Evergreens (I just took apart the door swag from yesterday's vignette)
Raffia or string
Scissors
Something to cut your evergreens into pieces
Wire cutter

Step One: Insert your birch branches one at a time into the arms of your chandelier. One on each side and intersecting with each other to form a square.


Step Two: Using a ratchet pruner or other tool, cut your evergreens apart in lengths that will fit your chandelier. Lay on top of the birch branches.Then add your small birch branches on top of these and if you can angle them so they kind of stick out (either on top or at the sides) that gives your design some extra depth.I like how these really give the design a wild, natural look.


Step Three:Using your wire cutter, cut your artificial berry branch into 2 or 3 pieces. Insert a larger piece of the berry branch up through the bottom center of the design.You should be able to stick it in at an angle and let it rest on the birch branches. If you need to you can use a twist tie and wire the branch to your chandelier. Take your smaller pieces of berry branch and insert into top of the arrangement .

Step Four: Place your bird nest into the center of your display, if possible.Then, using your raffia or string, wrap around your pine cone's bottom, between layers of pine cone.Tie as tight as possible and repeat with 2-4 more pine cones.


Step Five: Tie your pine cone strings to the chandelier's center and allow to hang at different lengths. If you like you can use an extra long piece of raffia and tie it to the pine cone about 5-6 inches from end. This allows extra raffia to dangle with your pine
cone which looks pretty. :)


Don't forget to join us tomorrow for more ideas to help put you into the holiday groove. Yay! I'd love to know more about what you're doing to decorate this holiday season, what you've liked best of the different ideas so far, and if you have any questions about the how-to or tutorials. So Please Leave a Comment!

Saturday, October 23, 2010

Tips for Enjoying the Seasons

Yesterday we had a pumpkin party with my son, and his second cousins. It was planned spontaneously, so really pretty much unplanned, but still lots of fun. We carved pumpkins, danced the Monster Mash and pretended to be Ghostbusters. We ate pizza and played outside until it was time to "fire" the pumpkins.

Kids add so much to the seasons. Which really makes me concentrate on the goodness of a particular season instead of the drawbacks of that time of year. Instead of dreading the lead in to winter that fall is, I'm out in the pumpkin patch. Or searching out scarecrow festivals. Or adding apples to every dish I make.

This fosters an attitude of gratitude for the fun and excitement the seasons can bring. I'm someone who gets the winter blues very easily, I can actually feel the loss of light that comes this season. I used to be able to pinpoint within a few weeks the time each fall my mood would darken and I'd begin to feel less social. I'd spend all winter barely talking to anyone and avoiding social situations.


Fortunately, I have a son now, and it's hard to cocoon if you have a kid. You want to give them all the wonderful things each season brings. Which means searching out that wonderfulness. So this weekend we did the pumpkin party. Today, I've got a Frankenstein costume to sew.

Soon, we'll be watching the first snow of the season flutter from the sky. But instead of watching it and anticipating icy roads, freezing cold, and layers and layers of clothes. I'll be looking at it with the sense of wonder my son feels. I'll see it as snowmen, hot cocoa, Christmas, and all the other wonderfulness that accompanies the season. To help you along, here are my tips for enjoying the seasons- anyone can do these things (no kids needed):


Tips for Making the Most of Each Season
1. Think about the colors of the season and start to pull them into your home. Add a throw or a pillow or some art that will change the color tones in your home.

2. Bring as much of the actual nature of the season inside as possible. Collect leaves and press them, create a mini art quilt, or add any decorations that might accompany the season. I love to bring in branches, honeysuckle, and apples and scatter them around my home. Hang them from the chandelier, drape them over paintings, and string them over windows.

3. Make a list of all the fun things you can do that are unique to this season. Then incorporate as many of them into your life as possible. It doesn't take long to visit an apple orchard, or pick up pumpkins from the farmer's market.

4. Think of the smells and tastes of the season and incorporate them into your home or life however you can. Stop and indulge in a pumpkin spice latte on your way to work, make pumpkin bread or squash soup this fall. For winter I love cranberries, turkey, the smell of gingerbread, and hot cocoa. Ooh- and my new fave for winter- coconut cake and my old favorite, sugar cookies with peppermint frosting.

5. Make a little scrapbook for each season- or around a holiday. I think it's fun to work with all the seasonal supplies that are out there and by creating a memory book for each season I think you'll have both an added incentive to do steps 1-4 as well as create something that you can pull out next year before the season begins to help you anticipate the season to come.

If you can think of anything else, or have something that totally makes a season for you, I'd love to have you share it with us in the comments. :)

Tuesday, September 14, 2010

Whoo- Do you Love? T-shirt Pendant Tutorial

Don't you love how ideas come together? You're browsing a bookstore and something kind of tugs at you, later you're at the fabric store and you get another tug, then you're driving home and spot something out the window- another tug. Sometimes that's enough and sometimes this can go on for weeks even months as little bits of an idea just sort of fall into place. As if you're mentally sorting a puzzle while discovering the pieces along the way. You never know just when you'll come across one.

The idea for this tutorial came about in this way. I found a book on fabric jewelry at the library, then I was thinking about some fabric necklaces I'd made last year for the book, later I was cleaning out my basement and found a ton of old t-shirts. Then, sorting the laundry I found the owl t-shirt I'd been looking for. All seemingly seperate actions and diverse images that became the basis for this tutorial. So take a look and if you make one or something inspired by it I'd love to have you post them on my facebook fan page! Thanks!

--------------------------------------------------------------------------------------

Owl Pendant: T-shirt Necklace Tutorial

Tools and Materials
knit t-shirt fabric in asst. colors ( I have light blue, darker blue, and cream)
embroidery floss to contrast with t-shirt colors (I used blue, brown, and orange DMC)
needle
scissors ( I like the small Ikea scissors for trim work)
Crop-a-dile
eyelet
jump ring


Step One: Cut from your material the basic owl shape. I cut this free hand but you can make up your own template.


Step Two: Cut pieces for the front belly of the owl, the wings, and the eyes. To get the exact shape of the wings I placed my large owl shape on top of my light blue fabric and cut following the edge of that shape.

Step Three: Using your needle, threaded with embroidery floss very carefully stitch the front of the owl, the eyes, and then add any extra decorative stitching you desire. I free-stitched the eyes, and added a little stitching to his head.


Step Four: Make sure any loose threads are knotted close to the fabric and trimmed on the backside of your pendant.


Step Five: Place your owl on top of another piece of t-shirt material that's slightly larger and stitch together by going around the edge of your owl shape. When you get to the spots where the wings should go add them in. Carefully trim around your shape.


Step Six: To finish your pendant use your handy-dandy crop-a-dile and add the eyelet. To add the eyelet you first have to cut a hole for it. To do this use the larger hole punch on your crop-a-dile. Then place your eyelet in and squeeze to secure. * variation below
Step Seven: Cut a strip of t-shirt material to your desired length. Add a jump ring to your eyelet and then thread your fabric through this. Tie the two ends together to make a knot and wear your fabric pendant with pride!!!


*Variation*- You can stop at step 4 before adding the eyelet and add a pinback to your owl instead. That option would look like this... For added embellishment you can also add some decorative stitching to the front cream part of the owl. I thought stitching on some overlapping antique shell buttons to represent feathers would be cute here too. Or stitch on a neck tie- it's up to you!!!

Sunday, May 9, 2010

Happy Mother's Day Mom!!!!

Being a mother has gifted me with the ability to more fully understand my mother. I've always known that she loves me, that she cares and dreams and hopes for me. But now that I have a child I understand how involuntary and all encompassing that love is. You don't choose it. You don't ask for it. You don't develop it. It simply is. It's born within your heart as they dawn on your world. Forever changing it.

This year I bought my mother a special gift. Usually I do a piece of art, or frame a photo, or give her a plant. This year I bought my mother Shona Cole's book, The Artistic Mother. It's a book that she's seen and loved and I'm hoping it encourages the artist in her. So Happy Mother's Day to my Artistic Mother. I love you and thank you for being my mother.

A Happy Mother's Day wish for all of you reading who are mothers too. Enjoy your day and know that you are a blessing!!!

Wednesday, March 17, 2010

The Luck of the Irish

Found a few things on etsy this morning that had me Irish eyes a-smiling: leprechauns, rainbows, and of course, todays' favorite beverage of choice, BEER!

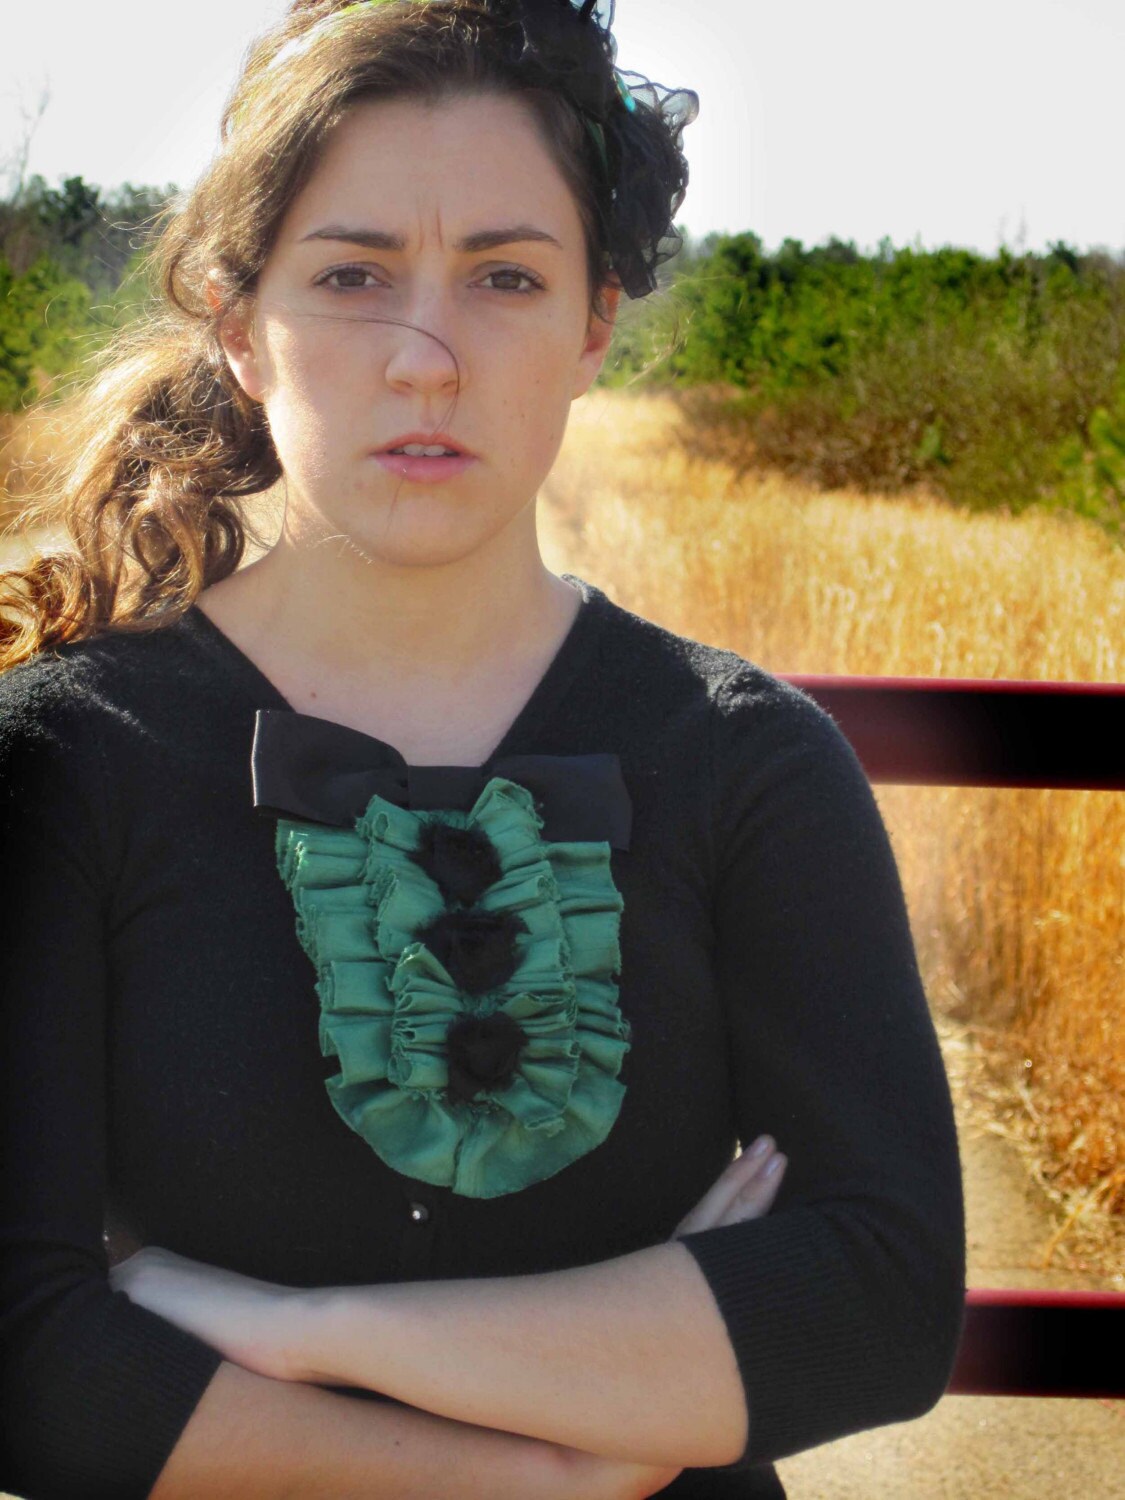
This lovely shirt with the faux shirt front is by E W McCall, you can see more of their line here. I also spotted a lovely green plaid coat....


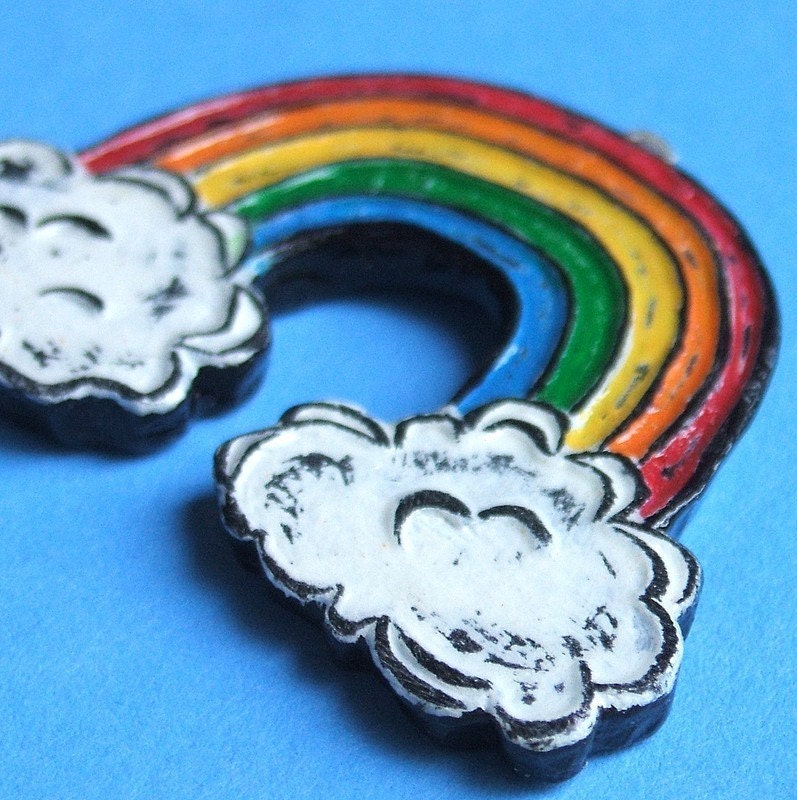
As a child of the '70s I have to admit I've had my eye on this pendant from Block Party Press for a long long time. It would match the rainbow belt with my name on it I wore every single day in 2nd grade.


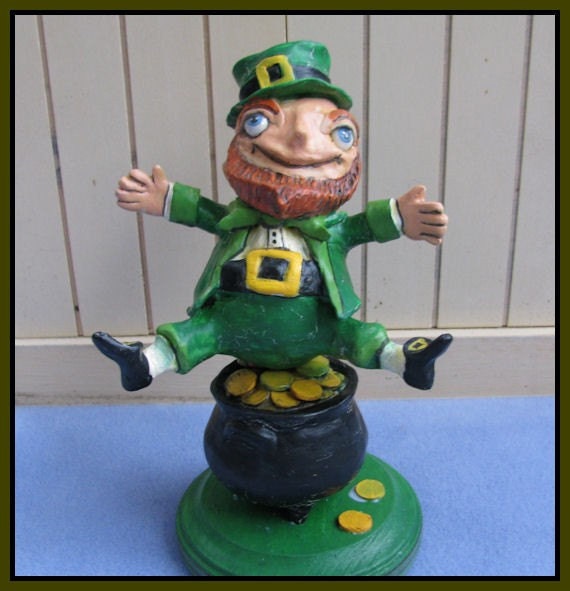
This little Leprechaun sculpture has a giant personality. I saw him here, and had to include him. He's just so Irish-y. :)


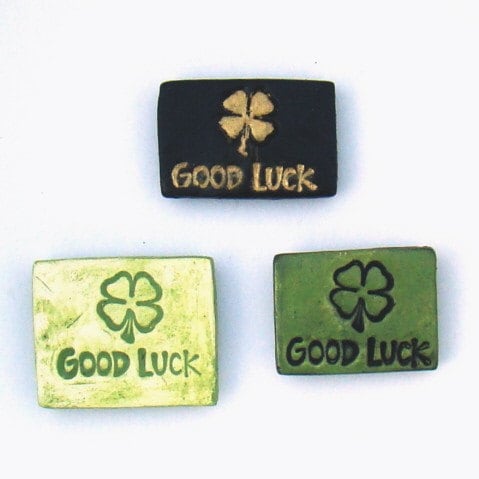
If you feel like spreading a little Irish luck around the office (maybe around promotion time) try handing out these cute little magnets as gifts!
You could even package them with a lottery ticket. ;) You never know!


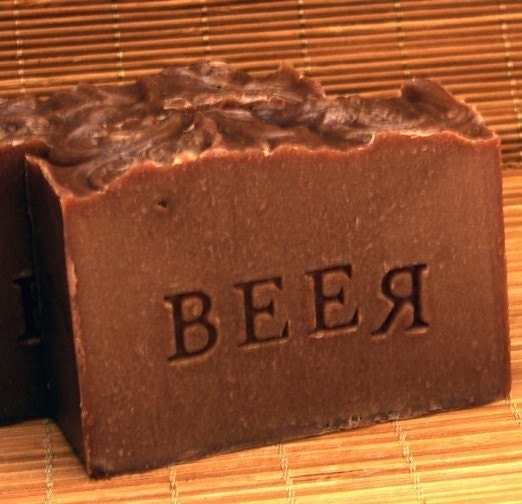
Made with Guiness B
eer (yes I did say, GUINESS), this soap is sure to please the manliest of men. It also has a blend of patchouli, clove, and oakmoss, along with a pinch of cocoa powder to help the color along. YUM!!


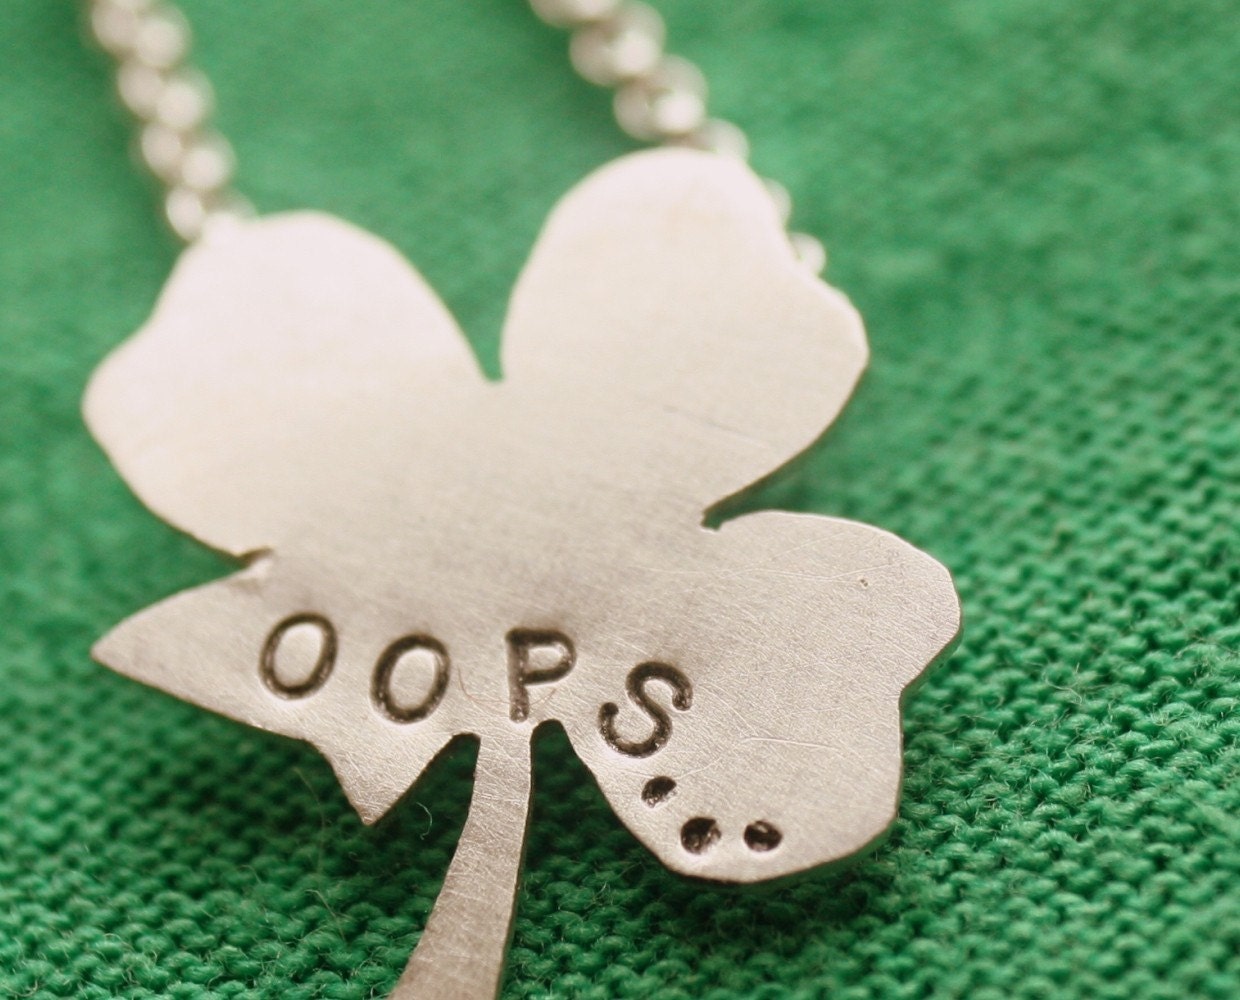
Had to add this last photo of the Just My Luck shamrock pendant by Beads in the Belfry. It's actually just MY luck....
but here's hoping that today's your lucky day!


Sunday, January 31, 2010

Valentine Inspired Art- 2009

The act of creating amazes me. Sometimes I have to really work to create something. These pieces seem to develop over time and take a lot of thought and questioning. I consider each decision I make carefully. Then there are the other times when the work seems to flow effortlessly and I hardly know what I'm doing. I just do it. Those are the pieces that to me seem inspired. Then I'll have to slog through 2, 3, or more of the first experience to reach the place where everything just flows effortlessly again. This can get discouraging. It's like reaching the peak only to have to go down and start all over again. I want the peak experience every time. I've come to realize though that art, like life, takes a commitment to work on through the difficult places. You have to be willing to create bad works of art in order to create a great one.

With Valentine's approaching I've been thinking about love and when I had the chance to create on Friday I did a light, sweet mixed media piece with lots of hearts (above). The entire process was a struggle. Nothing seemed to look just right. I think I painted over it 2-3 times at least. Finally I decided to give it a rest and I slapped a bunch of paint on some recycled canvases I had. Slopping paint is purely therapeutic and really that is where it's artistic value lies. But I was going to use these as backgrounds and really didn't care much about how the slopping went. Then the painting started to develop and became "true love..."This piece just flowed. It seemed to create itself- it was also a true reflection of how I see love now. The first piece was fun and sweet. This piece has a darker side to it. The text says: "true love comes only after we make the choice to be true to the one we love". I've been married for ten years to a wonderful man and I know now what I didn't know in the beginning. Marriage takes work and commitment not just sentiment and chemistry. It takes making the choice once those fade, and life gets rough to commit and be true. When I fell in love it was involuntary. Later, I made the choice to love truly.

So be willing to work when you don't feel like it. Be willing to make truly awful art. Trudging through those valleys, committing to the path, and then making that climb upwards is the only way you will reach the peaks.


Note: This was originally posted February, 2009- Enjoy!

Wednesday, November 25, 2009

Holiday To -do's

The holidays are almost here and my little boy has been asking everyday WHEN can we start to decorate? I'm making him wait til after Thanksgiving. Poor child! It's hard to wait- at any age. So today we are starting to get together what we'll need to celebrate Thanksgiving and then for the Cookie Baking Day which follows on Friday. So now that I'm thinking ahead I thought I'd share what's on my to do list these next few days.

  • Pouring through recipes to choose just the right cookies to add to our usuals this year.
  • Buying containers for all the cookies.
  • Taking a trip to Costco to buy all the ingredients- IN BULK!!!
  • Mixing up gingerbread dough and baking it in little house molds to assemble later.
  • Writing out our Christmas lists.
  • Listening to LOTS of Charlie Brown Christmas music
  • Listening to LOTS of other Christmas music.
  • Decorating Gingerbread houses with the boys.
  • Teaching them that more has to actually go on the house than goes in their mouths. (There's a ratio there...)
  • Putting up Christmas Lights.
  • Making sure no one falls and hurts themselves while putting up said lights.
  • Enjoying some time with family and friends- I hope you do too!!!
What do you do to prepare? I'd love to know...

Hope you have a wonderful start to the season!!! Happy Holidays!

Thursday, October 1, 2009

Starbuck's Inspiration

Here it is! More Harvest Decor that's quick and easy to make and add's a really nice personal element to your home. Here's the inspiration behind this project:

At the end of August I was looking forward to a couple of things happening in September. One was Jasper's first day of school and the other was the reintroduction of Starbuck's seasonal latte, the Pumpkin Spice. I've never been big into the coffee drinks, but one day as I was sitting with a friend over coffee the server came around with samples. In our memories it's strange what we can recall clearly and what seems fuzzy. The birth of my son- fuzzy. The first time I tasted a Pumpkin Spice Latte- I have complete recall of it. So yummy! So last year and now this year I've added it to my list of seasonal treats along with pumpkin bread and apple muffins.

When I started to create this little quilt I hand cut the pumpkin shape first with all of it's elements and stitched that on before I could think of what to add to the space above it. I thought of "Autumn", or "Harvest-y goodness", or just something about Fall. Nothing really worked. But then it came to me. "Pumpkin Spice is Nice." Now you may be thinking you would have chosen something else but this was personal art and I made the personal connection and now I smile when I see it. What simple pleasure could you make art of? Is there a Harvest osmell or activity you particularly look forward to each year? Something you'd like to share?

How To:
1) Creating a mini art quilt is fabulously easy (which I love), and you get great results (which I love even more)! To sketch out some ideas, then choose one and select some fabrics to work with. Working with different patterns and colors is really enjoyable to me so I sometimes start here and then figure out what to make of them.
2) Cut out a background piece- Here I chose black. Then, cut out your major design elements, I have the pumpkin, the leaves, etc. They cling really well to the background fabric once you set them on, so I use this opportunity to do some collage like playing around with the piece to further develop the design.
3) Once you have want you like laid out on the background piece, start to stitch them into place. Sometimes, just for ease, I'll glue on the smaller fabrics with a dab of the glue stick. Then using the embroidery floss of your choice start to straight stitch the pieces together. I love this step because the stitches add a drawing element that really adds to the collage feel of this process.
4) After I stitched down everything I usually step back to look at the overall design. This is where I decided on the "pumpkin spice" theme. I hand cut the letters and then glue sticked them down. I do need to go back over with some stitching to hold but it's good for now. Or I might pull them off and adhere them to a piece of that iron on interfacing. Then cut them and place them as desired. Easy!
5) Embellishment time! Now is the time to take a look at your design again and see if there's anything you can add to give it that extra punch. I chose to add the green backing fabric and some buttons. I have half a mind to go back in and add some salvage items I have, like an old roller skate key, but we'll see.
6) To finish I cut little strips from scraps of the orange fabric for ties. Bend the piece in half and then stitch to the top of your quilt. It can then hang from anything you'd like. I might switch this one over to an old ruler yet. Or a rusty old hanger. We'll see.... FUN!

Tuesday, September 29, 2009

Tutorial: How to Spell "BOO"!

Inspired by the season, Shelley of Singlestone Studios and I have put together a couple of projects to share with you this week. So swing on over to her blog after this for some more harvest inspirations! Here's my first contribution, a quick little project I created this weekend just for you bloggers! It's a little "Boo" sign that is both simple and cheap to create. I estimate that the entire thing cost less than $5. I did it myself but you could easily involve your kids in this one too!

What you need:
Materials
3 little unpainted wooden plaques (JoAnn)
19 gauge steel wire (hardware store)
4 odd cream buttons
chalkboard paint, black
paper towels
1/4 yd. approx. orange and black fabric (JoAnn)
glue stick

Tools
Craft drill
sandpaper
scissors
wire cutter
needle nose pliers

The HOW-TO
Part:
Step One: Glob on some of the chalkboard paint to the top of each plaque and rub it in with a paper towel. We're going for a glazed look so if you get too much in areas- wipe it off. I put just enough on to cover the wood completely, but still see the grain. Let dry.
Step Two: I used my craft drill and put holes in the top corners and bottom corners on 2 of the plaques but on the third only drill 2 at the top corners.
Step Three: Sand your edges to get a nice worn and spooky look.
Step Four: Cut out a "B", and 2 "O's" from the orange fabric. I handcut mine but you can blow up the letters in your word processor and then print them out for insta-templates. Just hold the paper and fabric together and cut around your shape. It's an easy way to get a certain font. I think hand cut works pretty well for this project however. Rough looks nice here.
Step Five: Cut about 12" of the wire and thread one end each through the top two holes of one of the 4 hole plaques. This will be the hanger, so leave a little slack and then wrap the ends around the wire and then trim excess. If desired you can make a little loop in the center where it will hang.
Step Six: Cut 4 lengths of wire approx. 6" in length. Thread through holes from back and connect the plaques one below the other and so on. I spaced the plaques as I wanted and then twisted the wire. Then wrap one end around the other and then clip the excess. The second end gets trimmed to about a 1/2" length and then you insert it through a button. Wrap the wire over into the second button hole and then under for security and then trim any leftover wire. Do this 4 times to finish.

So there you go 6 easy steps and you have a stylish and spooky bit of home decor you created yourself! This same project could be altered so that the plaques are side by side and say trick or treat or use a harvest theme such as Be Thankful. Instead of text you could also get creative and do a trio of bats or pumpkins. If you go harvesty painting the plaques a pumpkin or deep red tone and then accenting with a bit of gold paint would be very pretty. You could also use these to go 3-d. Simply drill through the plaque where you would like to add your skeleton keys or sticks or whatever and then wrap the item with wire and twist behind to secure. I think using old wallpaper on these would be fun too. SO a simple shape but lots and lots of places to go with it. I could see a triptych created from these as well.

Friday, September 11, 2009

SPOOKY!!

We're starting to get into the season here and yesterday's shopping trip did nothing to curtail the urge I'm feeling to spookify my home. The first shop I walked into was brimming with cauldrons and witches and spooky spooky decor. LOVED IT! So I bought a few things and set them up while cooking dinner last night. I couldn't wait. Unfortunately that meant that my family did. We ate a little late. But when one feels the urge to decorate I say go for it! So I pulled out my bittersweet garland and played around with some crows I had purchased earlier. Very very fun.

Then this morning I woke up with plans for adding some written wire words (BOO!) and a spooky tree. I pulled out a tree form I'd started a while back and finished the wire work on that and let Jasper put his little cat and pumpkin knick knack under it. He's always afraid I'm going to sell the stuff he likes so he made sure to tell me that it was NOT for sale. Kind of cute. I'm thinking it needs some spider webs and maybe a noose. Or some bats and ghosts hanging from it 's branches. I also have some boo-tiful orange and black fabric that I'm thinking might look really cute stitched to the leaves. Although that might be over kill. Still I like the idea. I've also got some plans for a big wire spider's web with a scribble spider to hang in my foyer. Or maybe we'll make the spider's body of fimo. Ideas... ideas! A big moon would be fun as well.

And just to whet your appetite a little more... I want to introduce you to one of the most creative books I've stumbled on lately; Matthew Mead's Halloween Book. It's got one great idea after another and I just positively love them all. Party decorations, yummy spooky eats, stitched fabric moon quilts, and fabulous little needle felted pumpkins are just a few of the goodies in this must-have or at least must-look at book for the season. I love it! Oooh.. and in the next few days I'll try to post a few more scary ideas and I have a tutorial that's been requested as well. Lots and lots of fun you won't want to miss. And remember now...(insert spooky cackle here) YOU'Ve BEEN WARNED!!!!!!!!

Monday, August 3, 2009

Fall Colors

This weekend was the turning point for a project I've been working through lately. I've been trying to come up with a fall leaf garland and although I had the basic conceptual of it fairly early on some the "how to" was taking it's dear sweet time actualizing. It was the fabrics that were giving me the most trouble. They would define the mood and feel. Felt- a little cozy and comfy but definitely simple and a little kids- crafty. Seasonal Quilt fabric- ok but a little too much in my opinion. It screamed fall and as the shape will do that, so I thought the fabric didn't need to as well. I found a lovely scrolled ornate pattern I liked that would probably work and it came in both orange and brown but no red for the maple leaves. But then I found a scrap of batik I had and I love how the sun shines through this fabric. It would look beautiful hanging in front of a window, which is where I kind of visualized putting it. YAY! Problem solved!

The basic leaf concept I came up last year as I was casting about for some fall decorations. I wanted leaves to hang from my chandelier over the dining room table. For V-day I hang a stitched and stuffed wire heart, for Christmas some ornaments I've made. It's my revolving seasonal display. Thinking about it some- I realized what a big inspiration the calendar can be. Creating your own handmade decor for the holidays and seasons can prompt you to play with color schemes and imagery you might never have tried before. I don't naturally turn to browns and yellows in my work. But I love working with them. I just don't think to. But for fall? I can't think of anything I like better than to be surrounded with the browns and oranges and deep reds and golden yellows that define the season. So think about it. How could you surround yourself with the loveliness of the season? Then let yourself be inspired!

Thursday, July 23, 2009

At the Lake...

We've been at the lake for the last few days. And July, I decided, really the best time to be here. Minnesota winters last a long long time and so many of our trips to the lake don't include any lake activities. But in JULY- we've done boat rides, Jasper's gone fishing and swimming and tonight we'll do a campfire. Very nice to be here. I'm also getting some work done, some writing done and some projects defined. Played with chicken wire this morning and will play with plaster this afternoon. What could be better?

Hope you are all finding the time to enjoy right now as well. Happy Summer!!!

Wednesday, July 15, 2009

At Last! New Listings on Etsy

Seems like it's been forever- but I now have some new items listed! There a bunch of new wire words, some wall size and some embellishment size. I love these stitched to either canvas or my mini art quilts. There's also my favorite of the new listings- a scribble pear and scribble apple. They're the perfect "pear". Ok sad thing is I used that in the listing too.

Next on the to do list- I have 5 finished book projects due soon (luckily I also have a mom and dad who are willing to babysit next week).

I'd love it if you'd check out the shop to see the rest of the new items! Thanks!

Saturday, January 24, 2009

Working Inspiration

The act of creating amazes me. Sometimes I have to really work to create something. These pieces seem to develop over time and take a lot of thought and questioning. I consider each decision I make carefully. Then there are the other times when the work seems to flow effortlessly and I hardly know what I'm doing. I just do it. Those are the pieces that to me seem inspired. Then I'll have to slog through 2, 3, or more of the first experience to reach the place where everything just flows effortlessly again. This can get discouraging. It's like reaching the peak only to have to go down and start all over again. I want the peak experience every time. I've come to realize though that art, like life, takes a commitment to work on through the difficult places. You have to be willing to create bad works of art in order to create a great one.

With Valentine's approaching I've been thinking about love and when I had the chance to create on Friday I did a light, sweet mixed media piece with lots of hearts (above). The entire process was a struggle. Nothing seemed to look just right. I think I painted over it 2-3 times at least. Finally I decided to give it a rest and I slapped a bunch of paint on some recycled canvases I had. Slopping paint is purely therapeutic and really that is where it's artistic value lies. But I was going to use these as backgrounds and really didn't care much about how the slopping went. Then the painting started to develop and became "true love..."This piece just flowed. It seemed to create itself- it was also a true reflection of how I see love now. The first piece was fun and sweet. This piece has a darker side to it. The text says: "true love comes only after we make the choice to be true to the one we love". I've been married for ten years to a wonderful man and I know now what I didn't know in the beginning. Marriage takes work and commitment not just sentiment and chemistry. It takes making the choice once those fade, and life gets rough to commit and be true. When I fell in love it was involuntary. Later, I made the choice to love truly.

So be willing to work when you don't feel like it. Be willing to make truly awful art. Trudging through those valleys, committing to the path, and then making that climb upwards is the only way you will reach the peaks.