
So I was playing around with the Blogger in draft option and changed the blog a bit. ;) I'm not sure yet how I feel about the result and as I did save my previous template you might see it return. I do think it's important to try new things, live with them a bit and then decide if you're going to toss them or keep them. So we'll see. I'd love some feedback if any of you feel so inclined!
One note: The pages option will allow me to post a portfolio and an "about the book" page when that time comes. So it could be good....
Tuesday, March 30, 2010
Monday, March 29, 2010
Wall Flowers- New Art in Etsy Shop!!!
 I had an idea a while back for a line of home decor accents called wall flowers. Little whimsical flowers you could buy in a set and then arrange to hang around a special photograph or art. They would hang simply- with just a finishing nail and add a sense of sweetness, uniqueness and of course- WHIMSY to your home decorating.
Sometimes when we have ideas and we envision something the reality just isn't the same. When I finished hanging these little blooms on my wall this morning and stepped back, I was so pleased with the result. They're sweet little embellishments and are just the right size to really accent the space. They really do add to the arrangement of photos and art I have them interspersed around.
Another first for my shop, I'm offering them with the option of finishes. They are available in the original anodized black, a rust color, and a vintage distressed cream. I'm envisioning the flowers in cream arranged over a little girls' bed, maybe around her first initial. So sweet!

So if you've been searching for that special element to add interest and that handmade touch to your home then consider these little wall embellishments. I'd love to have you head on over to the shop and take a look and then, have a lovely day!!
Friday, March 26, 2010
Tutorial: T-shirt Pirate Shirt
 Shiver me timbers!! Thought I'd continue the Pirate theme from yesterday with this nifty t-shirt transformation. The inspiration for this came a few weeks ago when Jasper was invited to a Pirate themed birthday party. The birthday boy's mom is a friend and so I knew she'd made a vest and pirate pants for all the kids who would be attending. Her request was that the kids would wear a white shirt to the party to complete the look. So 45 minutes before the party's start time I was at Target purchasing a white t-shirt. I decided to alter it a bit when I got home to make it a bit more "pirate-y". It was easy and quick- which was good because by the time I got home it was only 20 min. til the party started. :)
Jasper loved the shirt and he did look pretty cute in his finished outfit so I thought I'd share the how-to with you! Aaaargh!!
-------------------------------------------------------------------------
T-shirt Pirate Shirt
 Tools and Materials:
White T-shirt
Old brown t-shirt
 Scissors
Crop-a-dile
Directions:
 1. Using a scissors, cut a jagged edge along the bottom of the shirt. I didn't care if it looked perfect (in fact it looks better the messier it is) so I cut through both layers at once.
 2. Then cut the sleeves in the same jagged pattern. I cut triangles but you could probably get a good look by just cutting strips into the shirt as well.
 3. Cut off the t-shirt's collar and then in the front center of the shirt cut a "V" approx. 4-6" long.
 4. Using a Crop-a-dile, punch holes in the t-shirt symmetrically and slightly spaced apart along each side of the "V" (as pictured).
 5. Cut a 12-14" strip about 1/2" width from an old brown t-shirt (it will curl slightly). Thread through hole in a criss-cross pattern.
 6. The finished shirt! Jasper's ended up being a bit big for him through the shoulders so I folded the shoulder fabric over and stitched it in place with embroidery floss.
Cute!
Thursday, March 25, 2010
Local Craftiness: Ilymore
 Aaaargh! It's a good day to be a pirate! My son was headed out the door earlier wearing his favorite shirt and pirate hat and posed quickly. The shirt he's wearing always gets a ton of compliments. It's got the first initial of his name on the front and his age on the back. Usually what happens is he runs by in a blur, another parent goes "oooh how cute!" and as I'm taking off after him I holler out that "a friend of mine made it and she sells them too! Her shop name is iiiiiilllllyyyyymooooooorrrrreee." It's actually ilymore but that's how it sounds as I'm running after my son.
Ilymore stands for I love you more. So cute! As are her creations. Take a look! She sells through her blog at www.ilymore.blogspot.com. The girl shirts are possibly my favorites as she has the cutest fabrics to choose from. But those boys... well you have to agree they just rock them.:)
So head on over to Michelle's blog and design your child's personalized, one of a kind stitched shirt today!!!

Wednesday, March 24, 2010
The Importance of Being a Beginner
 I went to a metal working class last night at The Studio at Rush Creek. It felt absolutely wonderful to be in a studio atmosphere again, and I loved the class I took. I learned to use a jeweler's saw, a metal punch, a foredom flexible shaft drill, and a whole slew of other things. The class was actually titled Riveted Jewelry, and everyone in the class had a chance to make a pendant. It was so exhilarating to be learning something new and so I was surprised at how inept I felt at the same time. It's hard being a beginner at something. Especially if you've gotten pretty good at your "thing". I felt extremely unskilled, made a ton of mistakes, and generally had a wonderful time.
But here's how my evening went:
- I cut out the heart shape with a jeweler's saw and snapped the blade.
- I punched out the silver disk and because I couldn't remember which way was right, I unscrewed the handle, popping out a spring, that thankfully went back together pretty easily (before too many people noticed).
- I decided to give the edge of my disk a "hammered" look and because I missed the edge ended up "texturizing" the entire disk to cover it up.
- I used the saw to cut a 1/4" slice off of a copper tube for the center rivet, and lost it on the last cut-twice. So I spent quite a bit of the time crawling around the floor and asking people if they could please move a little so I could get my bit of tube. I realized the second time around I had low ride jeans on so that made the crawling around a little interesting. Crawl, yank up the jeans, crawl, pull down my shirt... you get the idea.
- I dulled the drill bit (I think) because I forgot to hit a divet to mark the drill spot first.
- And I filed off a couple of nails, as I was trying to even out my cut on the tube rivet. I'd claim I ruined my manicure but I rarely have one so the uneven appearance of my nails isn't that big of a deal.
Audrey Flack, in her book Art and Soul, relates a conversation with another artist where she admits she did bad art for a whole year when she picked up her watercolors again. She was an extremely skilled sculptor at this time and to be willing not only to put herself back to the beginning, but to go through the experience of "making bad art" for that long is such an inspiration to me.
So be a beginner again, let yourself make bad art, be gentle with your artist self as you learn and make mistakes; it could be the start of something wonderful.
Sunday, March 21, 2010
How to Artfully Display Ribbon
 Oh- it was such a lovely discovery. I was cleaning up my art room yesterday and wondering what to do with the pile of ribbon I had. Right then they were in a heap. Not too organized or pretty. Then in one of those moments of inspiration I looked up at the wall where I'd hung a wire bird cage I'd made and Voila'- I had it! I hung the ribbons on the bottom wire of the birdcage and let them drape, and then added a couple of clothespins to secure. Lovely, simple, and I really enjoy seeing the cascading colors as they hang on my studio wall.
Excited and inspired, I made another little birdcage, this one with the bird outside the cage, and used the clothespins to pin up an old postcard of Paris, and a photo of Venice. Like you, I love to be surrounded by beauty and art. But in a small home, the wall space is dear. I need it for storage as well as display. This little discovery does both- it creates an artful display.
Now I'm looking around my home again, wondering what else I could enlist in my fight against chaos. What could I create that would be both practical and artful? It's a question that often results in inspirations for me. What could you design to help you with some of your design dilemma's? Think about it a bit and I bet you'll be inspired as well!
BTW- The birdcage at left is going into my Etsy shop tomorrow morning. So if you think it would look nice hanging in your studio as well, please stop by!!!
Friday, March 19, 2010
Tutorial: Birch Branch Easter Trees
Yay! The fi rst day of spring is almost here! Kind of. Here in Minnesota the weather's grey and in the low 30's. Yesterday felt a good deal more spring-y. But in my Mops meeting today we talked about Easter and Easter traditions and that really did help the spring feeling along a bit.
As a mother with a young child I find myself in the position of not only passing along the traditions I grew up with, but able to instigate new one's as well. The tradition of decorating Easter eggs is a fun one we both enjoy but after the actual decorating the eggs just sit in the fridge until I throw them out. I wanted a better way of enjoying them. So this year we're going to make cute little blown egg ornaments and hang them on our Easter Tree. That required an Easter tree. Coincidentally, our mentor mom had this same egg project in mind for my moms group and so I volunteered to make 18 of these trees. 18. It turned out to be a fun and easy craft, one that my son helped me with. So I thought I'd pass along the how-to instructions for you and your family. Enjoy!!!
- - - - - - - - - - - - - - - - - - - - - - - - - - - - - - - - - - - - - - - - - - - - - - -
Easter Tree
Tools and Materials
a container
a block of styrofoam to fit container
3-5 branches (I used birch)
5-8 silk flower heads (mine were pulled off a stem of hydrangea)
Silk leaves (I cut them from the hydrangea stem)
Raffia or moss (optional)
Hot glue
Directions
 1. Cut your styrofoam to fit your container. I used an empty paint can for my container and to judge how much foam to trim I pressed my foam onto the opening, thus getting an imprint that showed me right where to cut. Just a little trick. :) Using the hot glue, apply glue to the bottom of your foam and then place in container.
 2. Insert your branches by pushing end into foam. If you'd like to add hot glue to the ends you can, it really secures them nicely. I don't because I like to be able to rearrange the branches if needed to get their placement just right. :)
 3. Either insert wire ends of silk leaves into foam, or glue them into place with hot glue. Use the raffia or moss to cover any foam that might be still showing.
 4. Pull the florets off a silk hydrangea and use the hot glue to stick to branches. To cover the glue and help secure the flower head I either pressed a second flower to back of first, or would wrap one of the petals around the branch to the back and use to cover glue. Do this right away while the glue is still warm.

Add any decorations you have (or make the stitched carrots from last post) and display somewhere you'll be able to soak up it's spring beauty- I have mine displayed as a centerpiece on my dining room table with a little nest and some daffodils. It's an oh-so-easy springtime vignette!
PS- I think this would make a beautiful outdoor display idea for early spring entry pots as well. A bunch of birch branches with some flower heads glued on and it'll look to others like you have flowering branches framing your front entry.
 rst day of spring is almost here! Kind of. Here in Minnesota the weather's grey and in the low 30's. Yesterday felt a good deal more spring-y. But in my Mops meeting today we talked about Easter and Easter traditions and that really did help the spring feeling along a bit.
As a mother with a young child I find myself in the position of not only passing along the traditions I grew up with, but able to instigate new one's as well. The tradition of decorating Easter eggs is a fun one we both enjoy but after the actual decorating the eggs just sit in the fridge until I throw them out. I wanted a better way of enjoying them. So this
 year we're going to make cute little blown egg ornaments and hang them on our Easter Tree. That required an Easter tree. Coincidentally, our mentor mom had this same egg project in mind for my moms group and so I volunteered to make 18 of these trees. 18. It turned out to be a fun and easy craft, one that my son helped me with. So I thought I'd pass along the how-to instructions for you and your family. Enjoy!!!
- - - - - - - - - - - - - - - - - - - - - - - - - - - - - - - - - - - - - - - - - - - - - - -
Easter Tree
Tools and Materials
a container
a block of styrofoam to fit container
3-5 branches (I used birch)
5-8 silk flower heads (mine were pulled off a stem of hydrangea)
Silk leaves (I cut them from the hydrangea stem)
Raffia or moss (optional)
Hot glue
Directions
 1. Cut your styrofoam to fit your container. I used an empty paint can for my container and to judge how much foam to trim I pressed my foam onto the opening, thus getting an imprint that showed me right where to cut. Just a little trick. :) Using the hot glue, apply glue to the bottom of your foam and then place in container.
 2. Insert your branches by pushing end into foam. If you'd like to add hot glue to the ends you can, it really secures them nicely. I don't because I like to be able to rearrange the branches if needed to get their placement just right. :)
 3. Either insert wire ends of silk leaves into foam, or glue them into place with hot glue. Use the raffia or moss to cover any foam that might be still showing.
 4. Pull the florets off a silk hydrangea and use the hot glue to stick to branches. To cover the glue and help secure the flower head I either pressed a second flower to back of first, or would wrap one of the petals around the branch to the back and use to cover glue. Do this right away while the glue is still warm.
Add any decorations you have (or make the stitched carrots from last post) and display somewhere you'll be able to soak up it's spring beauty- I have mine displayed as a centerpiece on my dining room table with a little nest and some daffodils. It's an oh-so-easy springtime vignette!
PS- I think this would make a beautiful outdoor display idea for early spring entry pots as well. A bunch of birch branches with some flower heads glued on and it'll look to others like you have flowering branches framing your front entry.
Thursday, March 18, 2010
Spring Surprises
 I love Spring. I think the first day of Spring should be a national holiday that we all celebrate. Preferably with a picnic outside (no matter how cold) and flowers. Lots and lots of flowers. So tomorrow my kid and I will have our lunch on the front step and be glad that it's finally spring.
Needless to say, everything bright and clean is catching my attention these days as I anticipate the change in seasons. Things fresh and growing pull me in their direction auto-magically. I delight in them. So imagine my joy when I opened an e-mail and found a brand new set of blog and etsy graphics. All spring themed!!! Shelley, of Single Stone Studios designed them and then sent them as a surprise. I LOVE them!!! They're bright and white and whimsical and really just what I'd had in mind when I'd thought of changing my look. Such a sweet springtime surprise!
A springtime surprise I have in the works are some super cute Easter trees. I'm going to keep the finished photo for tomorrow, but I thought I'd tease you today with a mini tutorial for the cute little felt carrots I made to decorate my sample. Today I'll be finishing the 18 trees I'm making for my MOPs group and they'll be decorating them tomorrow. Then tomorrow afternoon I'll post the how-to for the trees here, so I hope you come back for that!
- - - - - - - - - - - - - - - - - - - - - - - - - - - - - - - - - - - - - - - - - - - - - - - - - - - - - - - - - - - - - -
Stitched Felt Carrots
Tools & Materials
1- 8 1/2" x 11 sheet orange felt
1- 8 1/2" x 11 sheet light green
1 -8 1/2" x 11 sheet true green felt
Orange embroidery floss
Green embrodiery floss
Chenille needle, size 18
Scissors
Tip* Threading your needle with floss before you begin steps 1 and 4 makes the step easier.
 Directions
1. Cut a triangle from the orange felt and a couple of strips from the 2 pieces of green felt (as shown above). Roll the triangle and then using a threaded needle and orange floss, pierce the bottom point of the triangle. Whip stitch once around point and then straight stitch along length of carrot.
 2. Pinch the top of the carrot together to create gather and then stitch through folds several times to secure. Knot thread and clip.
3 . Trim the top of your carrot flat. Be careful not to cut through your stitches.
 4. Fold each of the green felt strips in half to form loop and hold together. Then bend up ends around the center loops. Using a threaded needle (green floss), stitch through the bottom of this gather several times, from multiple sides so that you can be sure it will keep desired shape.
 5. Without cutting your thread, use needle to stitch green felt to top of the carrot. Stitch up and through green felt and then down and through orange felt from all sides until securely attached.
 6. Using your scissors, you may cut into the ends and loops lengthwise to create multiple strips.This step is optional but I think it looks more like a carrot top if you do it. Be sure not to cut through your stitches however. Use one of the top loops to hang or stitch a loop of embroidery floss to create loop for hanging.
A springtime surprise I have in the works are some super cute Easter trees. I'm going to keep the finished photo for tomorrow, but I thought I'd tease you today with a mini tutorial for the cute little felt carrots I made to decorate my sample. Today I'll be finishing the 18 trees I'm making for my MOPs group and they'll be decorating them tomorrow. Then tomorrow afternoon I'll post the how-to for the trees here, so I hope you come back for that!
- - - - - - - - - - - - - - - - - - - - - - - - - - - - - - - - - - - - - - - - - - - - - - - - - - - - - - - - - - - - - -
Stitched Felt Carrots
Tools & Materials

1- 8 1/2" x 11 sheet orange felt
1- 8 1/2" x 11 sheet light green
1 -8 1/2" x 11 sheet true green felt
Orange embroidery floss
Green embrodiery floss
Chenille needle, size 18
Scissors
Tip* Threading your needle with floss before you begin steps 1 and 4 makes the step easier.
 Directions
1. Cut a triangle from the orange felt and a couple of strips from the 2 pieces of green felt (as shown above). Roll the triangle and then using a threaded needle and orange floss, pierce the bottom point of the triangle. Whip stitch once around point and then straight stitch along length of carrot.
 2. Pinch the top of the carrot together to create gather and then stitch through folds several times to secure. Knot thread and clip.
3
 . Trim the top of your carrot flat. Be careful not to cut through your stitches.
 4. Fold each of the green felt strips in half to form loop and hold together. Then bend up ends around the center loops. Using a threaded needle (green floss), stitch through the bottom of this gather several times, from multiple sides so that you can be sure it will keep desired shape.
 5. Without cutting your thread, use needle to stitch green felt to top of the carrot. Stitch up and through green felt and then down and through orange felt from all sides until securely attached.
 6. Using your scissors, you may cut into the ends and loops lengthwise to create multiple strips.This step is optional but I think it looks more like a carrot top if you do it. Be sure not to cut through your stitches however. Use one of the top loops to hang or stitch a loop of embroidery floss to create loop for hanging.
Wednesday, March 17, 2010
The Luck of the Irish
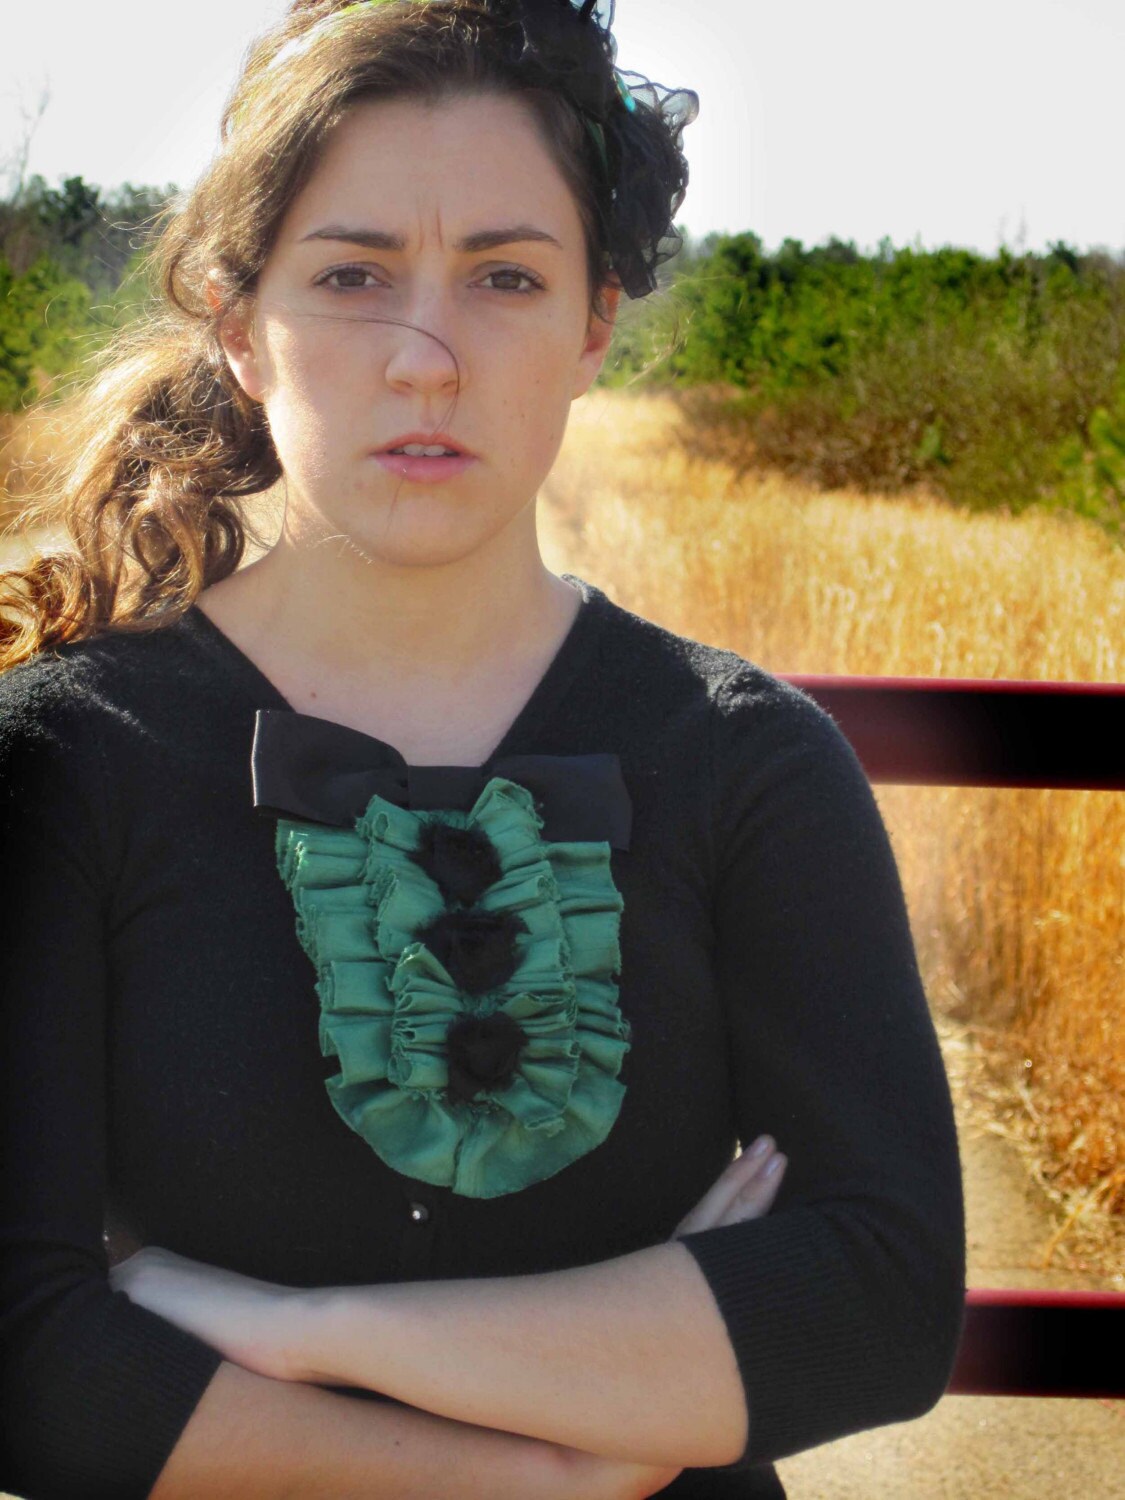 Found a few things on etsy this morning that had me Irish eyes a-smiling: leprechauns, rainbows, and of course, todays' favorite beverage of choice, BEER!
This lovely shirt with the faux shirt front is by E W McCall, you can see more of their line here. I also spotted a lovely green plaid coat....
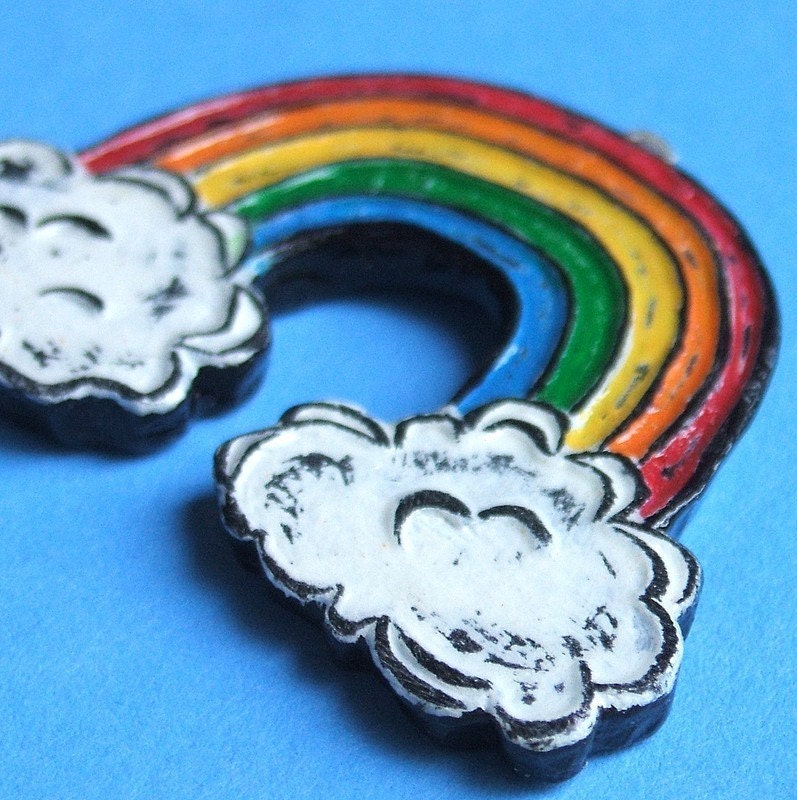
As a child of the '70s I have to admit I've had my eye on this pendant from Block Party Press for a long long time. It would match the rainbow belt with my name on it I wore every single day in 2nd grade.
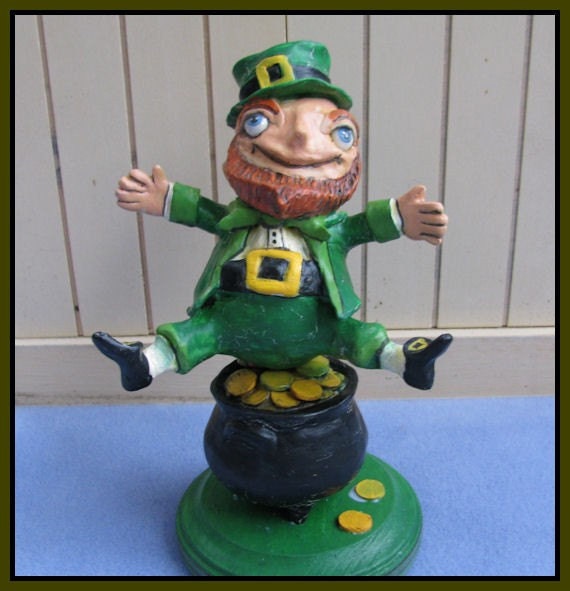
This little Leprechaun sculpture has a giant personality. I saw him here, and had to include him. He's just so Irish-y. :)
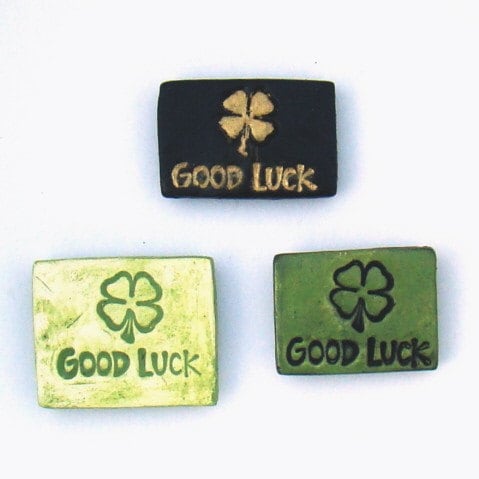
If you feel like spreading a little Irish luck around the office (maybe around promotion time) try handing out these cute little magnets as gifts!
You could even package them with a lottery ticket. ;) You never know!
Made with Guiness B
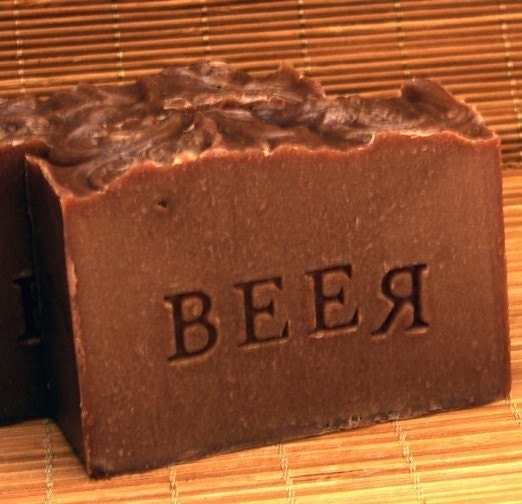 eer (yes I did say, GUINESS), this soap is sure to please the manliest of men. It also has a blend of patchouli, clove, and oakmoss, along with a pinch of cocoa powder to help the color along. YUM!!
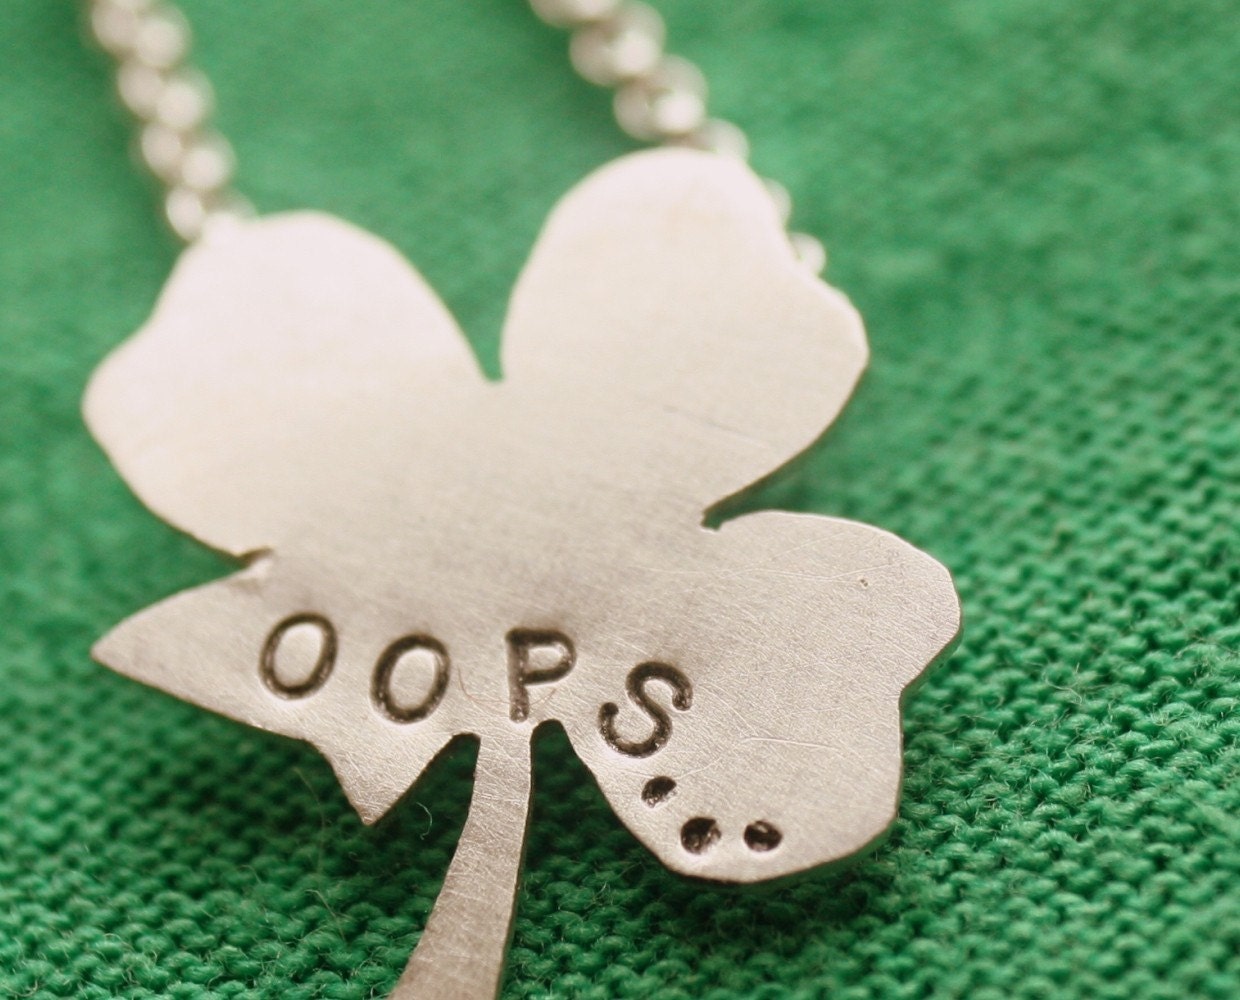
Had to add this last photo of the Just My Luck shamrock pendant by Beads in the Belfry. It's actually just MY luck.... but here's hoping that today's your lucky day!
Tuesday, March 16, 2010
Spread the Love
 Today I'm sending off this little heart to a benefit event in Josephine County, OR. The event is called Hearts and Heroes and will be selling heart art from many different artists. I was contacted via etsy because they were looking to add some more sculptural hearts to their collection.
Art Helping Others
One of my biggest reasons for pushing myself to sell my work was the hope that it could somehow benefit others. I wasn't sure how, but I wanted what I did to make a difference in the world.
My vague plan was: I would make it, others would buy it, and I'd send money to help the people who need it.
Definitely vague. What a blessing it was, a month later, to meet Raj and Juwonya, two of the individuals who run and care for the children at Mercy Orphanage in India. I love that the money I give them goes for important things, like another building so they can house more children and widows, chickens, and pillows. The necessary things in life we take for granted. I give 10% plus of my etsy sales to Mercy. Everyone who purchases from me makes that possible. Thank you!!!!
But lately I feel like I want to do a little more. So I am very excited that this opportunity came along. The fundraiser is to help children in need and those abused. Children that hurt aren't just a third world problem but are everywhere and those who give of their time and selves to save these children, to rescue them, to love them are definitely heroes to me. SO if you happen to be in the Grants Pass area of Oregon I know they'd love to have you attend this event.
PS- The heart I donated is one of my scribble hearts decorated with some of my 5-year-old son's art supplies. It needed to have something childlike and free spirited and to me that means crayons, silly straws, and paint!
Subscribe to:
Posts (Atom)