Showing posts with label how to. Show all posts

Friday, December 3, 2010

Mixed Media and Wire Christmas Star Tutorial

Welcome to Back to 'Tis the Season week here at Art as Usual! I've had a fabulous week getting inspired for the holidays. Here on the blog we've looked into the Peppermint Candy trend of decorating, the Winter Woodland trend, and today we're going to be dipping into the Handmade Christmas Trend. I've got two parts to the tutorial that will accompany this post so I'm going to post one part and then finish up the project and post the rest of it. It's going to be really cute though.

I'm guessing that because you're reading this that you too LOVE creating. You love the experience as well as the product you have when finished. It's really the combination of those two parts that make handmade so special. The contentment, love, and soul that goes into each piece is really something unusual in the Dollar Store businesses of today. Whereas so much of the world seems to be accumulating more and more of cheap imports, or mass-produced products, we who make things by hand are growing more and more appreciative of both our own, and others' handmade works. I love to see this happen. Now, the world being what it is, I do still purchase many of my supplies from big box craft stores and am grateful to have such easy access to them. But I LOVE the handmade art that comes of these excursions. So I'm not opposed to buying things from these stores. I just think there's something special about something that was made by a hand that was creating and not just producing as it worked.

In decorating this could mean many things. It could mean a tree that's filled with ornaments made by all members of the family. It could mean handmade stationary or gift tags, it could even mean that some of those presents under the tree were knit by hand. But however, handmade manifests itself, it always brings personality, love, care, cheer, time, uniqueness, and consideration to what you make.This year, for the first time ever, I get to put one of my own handmade angel sculpture's at the top of our tree. I can't tell you how excited I am by that.

Going handmade doesn't have to be an all or nothing thing either. Just adding a touch here or there makes such a difference and each year you can add one or two more things depending on your time. This year, I'm adding a star garland that I've had in mind for a while. I'm excited to share it with you because it's the first time I've ventured into the realm of printing my mixed media collages onto fabric. I hope you take a look, give it a try, and really enjoy your holiday surroundings this year. Let them inspire you. Make sure you LOVE your holiday space and that they really celebrate the Christmas Spirit. Enjoy!


Mixed Media Fabric and Wire Star Garland
Tools and Materials:
16-gauge and 19-gauge steel wire
Wire cutters
Pliers
Vintage/vintage looking papers
mark making supplies (stamps, pencils, china markers, inktense pencils, caran d'ache)
Distress ink with ink applicator (optional)
Adhesive
One plain piece of 8 1/2" x 11" copy paper and several same sized sheets photo fabric (canvas)
Scanner/ Printer combo
ScissorsNeedle and embroidery floss to stitch fabric to wire

Make the Wire Stars
Step One: Create a bend in your 16-gauge steel wire. Then, 4-5" from that bend create another bend and continue on until you've a star shape.


Step Two: Once you've formed your star shape, overlap the beginning of your star by about an inch.


Step Three: Using your 19-gauge steel wire wrap the overlapped wires together.


Making Mixed Media Fabric
Step One: Gather some collage supplies, vintage papers, some old music sheets, pages torn out of old books, anything you'd like to play with. On your sheet of blank paper start to layer your collage materials in a way you like. Adhere in place.
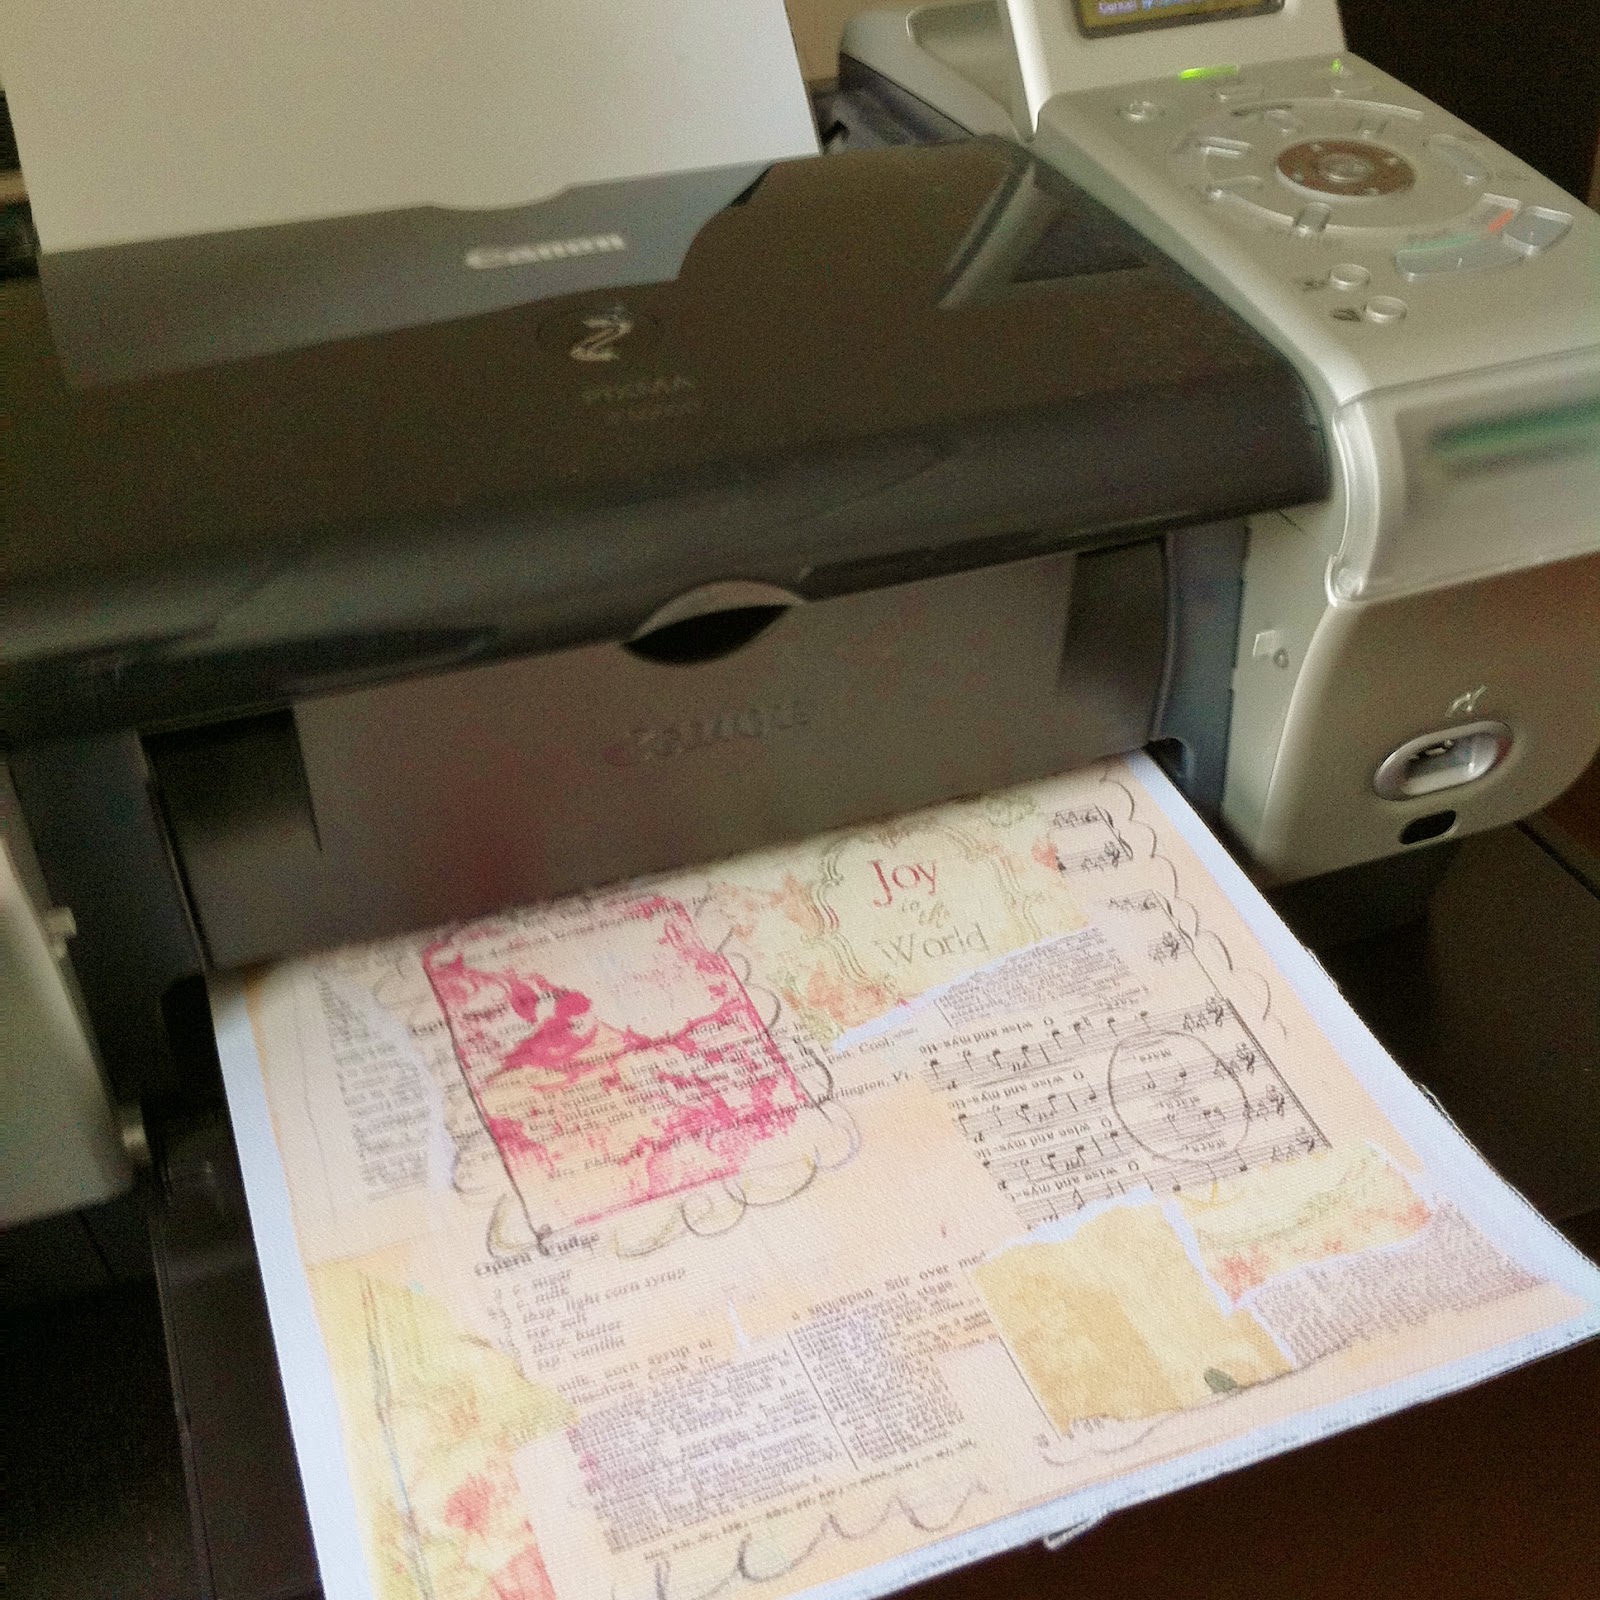


 Step Two: Use your mark making supplies to doodle, and draw on your composition. Have fun! Then use the ink applicator and distress ink to go back over some of your drawing (totally optional I just like to work stuff forward and back on my page).


Step Three: Scan your collage into your computer and print onto photo fabric (or you can use the freezer paper method). Peel paper backing off of fabric and you're ready to stitch!


Creating the Wire and Fabric Stars
Step One: Position your wire on the fabric as desired, then cut wide around this area.


Step Two: With your embroidery floss and needle, begin to stitch the wire star to the fabric. Do one side and when you reach the second half of the star slightly pull the fabric taut as you stitch.


Step Three: With your scissors, trim the excess fabric around your star leaving a 1/4- 1/2" allowance around the stitching.


Making the Garland:
 To make the garland I just cut a length of cotton canvas into a 1 1/2" w. and to the length you want. Make sure you cut it long enough that you'll have a little extra length so it can drape. Thread a needle with 4-5 in. of embroidery floss. Pierce the fabric right below the wire at the top of the star. Pull half your floss through, take off the needle, and tie your ends together. This creates a loop to hang your star by. Thread your strip of canvas through the loops of each star and position stars as desired. You may also want to add a few strips of contrasting fabric here between the stars as shown below. You can also add other shapes, like the wire snowflakes from a previous tutorial. They look adorable with the stars. :) Above all- Happy Creating! -Jen

Friday, October 8, 2010

My Favorite Flannel Earrings- Tutorial

You're probably thinking I'm a bit obsessed right now with my old flannel shirt. I can hear it now, "first the cuff and now a set of earrings- what is that girl thinking?" I guess I'm thinking fall and cozy and there's really nothing I love to snuggle up in more than a soft flannel shirt. So after having done the cuff a week or so ago I had some scraps lying around and it hit me at 5 this morning to try earrings. Plus I have this thing for surprising combination's- for example the flannel fabric combined with pearls absolutely delights me. I can say definitely now these are "my favorite flannel" earrings. Enjoy!
------------------------------------------------------------------------------------

"My Favorite Flannel" Earrings- Tutorial

Tools and Materials
2 small rectangles of fabric (to be folded over)
4 small shell buttons
4 Additional beads (I used 2 blue czech beads and 2 med. size pearls)
Embroidery floss
Needle
19-gauge craft wire
2 headpins (I used blackened color)
4 small jump rings (I used gunmetal color)
Round Nose pliers
Jewelry cutters
Needle Nose pliers (optional)

Create the stitched fabric element on earrings

Step One: Using your round nose pliers grip the end of your 19-gauge wire. Slowly rotate your wrist to create round loop. It should be flush against the rest of your wire. Then trim this wire about 2 1/2" - 3" from loop. This creates a eye pin that is a bit longer than they usually are. You might be able to buy them in this length however I think it's easier just to make one. :)


Step Two: Fold one piece of the flannel fabric in half to form a square and then insert your head pin in the center of the fabric through the fold.


Step Three: Thread your needle with about 10" piece of embroidery floss, knotted at end. Position your button in center of square, with a hole on either side of headpin and hold. Then insert your needle between the two fabric layers and come up through top piece through right hole on button.


Step Four: Then stitch down through left side of button and go through both layers of fabric. Slip 2nd button over needle and position in center of backside of fabric. Go up through other button hole and through right side button hole on front side of fabric. Stitch through buttons on both side one more time to secure and then, come up through bottom button hole only so your needle is between the two layers again. Angle your needle to the spot where you'd like to begin stitching around the edge of the square.


Step Five: Straight Stitch around the square when you get to a corner do a little back stitch so that it's a little more secure and then continue on to the next corner. When you've gone all the way around the flannel square then insert the needle back through one layer of fabric again so that you're once again between the layers. Tie knot and then trim end of floss.


Step Six: Using your needle nose pliers, grip the eye pin wire about a 1/4" from where it comes out from fabric square. Bend end of wire to create a 90 degree angle.


Step Seven: Then change your grip on the wire and pinch wire right above angle and then wrap the cut end of your wire around your round nose to create loop. Insert pliers through loop and hold as your use your other hand to wrap the excess wire around the neck of your loop to finish. Trim end of wire if necessary. Set this stitched fabric piece aside.


Create the bead dangle and finish earrings
Step Eight: Slip your two beads onto a headpin. Hold the beads and bend the wire at top at a 90 degree angle. Repeat procedure to make a wrapped loop as demonstrated in steps six and seven above.


Step Nine: Open two of your jump rings and holding one with your pliers so that opening is at top, slip your dangle and the bottom loop of your stitched piece onto jump ring. Close ring.Pick up second open jump ring and slip onto it one of your fish hook earring findings and the top loop of your stitched piece. Close ring and you've got one done!! Repeat steps above to create second earring for finished pair. Now slip them onto your ears, toss your hair back and check out the coolness. :)

Tuesday, August 17, 2010

Printmaking 101- Carving and Printing Your Stamps

To create text with a stamp carve the mirror image
Ready for more monsters? Yesterday I introduced you to the tools and materials you'll need to carve your very own stamps. Today we'll go over the basics for how to design, carve, and print proofs of your stamps.

First, create your design. I did this activity with my 5 year old so he did the design and I did the carving. The easiest way to cut the design you want is by directly drawing it on your stamp surface. Remember however that stamps do print as a reverse image. This is especially important to know when you're carving text. An easy way to see what your text should look like when carved is to write your word or phrase on a piece of paper and then hold it up to a mirror to see the text as you'll need to carve it. There are other tricks for this too but this one is pretty simple.

Next, we'll begin to carve out the stamp. What you're going to want to do is carve everything around your image. To begin, use a small v-tip and outline your shape. The rubber does want to tear so if you're doing an area that is highly detailed you're going to want to cut around your shape with an X-acto first. This will stop the rubber from tearing into your image. SUPER IMPORTANT!!!- Always Cut AWAY from yourself and never hold the stamp in a place while cutting where you might slip with the carver and hurt yourself. We are working with sharp blades which is why I don't allow younger children to handle the carving tools. After you do the detail carving around your image then go back with a gouging blade (they're shaped like u's) and carve out the rest of the area around your image. There is an element of design to keep in mind while you're carving- the carve lines. Everything you don't cut out will print- SO if you like the look of the block print you don't want to cut everything away, but leave a line here or there to print. I like the look of borders around my stamps so I'll usually leave the rubber around the very edge of my stamp untouched.


Proofing your stamps- We are working subtractively so you can't add more print area once you've carved that rubber away. So err on the side of too little and then do this proofing process until the stamp is perfect. Once you've completed your initial carving you'll find you have a little rubber crumbles left in the lines of your stamps. These could muck up your ink or your image so you need to get rid of them. I've tried brushing them out, knocking them out, but the best way to clean your stamp off is to run it under your faucet and gently rub your lines clean. Dry your stamp off with a towel and then ink it up and print it on a scratch piece of paper or fabric. If you do this and find there's an area that's not as detailed as you'd like or there's a line you don't want then go back to your carving area and fix it. Continue doing this until it stamps the image you want. When done, clean off your stamp before storing it somewhere flat.

This is a really brief "how-to" for relief printing. If you'd like to know more about inks, brayers, and printmaking papers there are a number of books on the market. It really is a fascinating process and so fun to know that when you're done you've created an unique tool that you can use in your work over and over again.