Tuesday, February 28, 2012

My Workshops for Art is .... YOU! 2012!

I am so very very excited to share this with you. This September I will be teaching two workshops in Petaluma, California as part of the Art is...You artists retreat. I can not tell you how jazzed I am. I kind of can't believe that not only will I be able to hang with people like you but I'll be at a retreat that is sure to be an unforgettable experience.

 A couple of years ago I had the privilege of meeting the two gals who founded this event and they are so so cute. And passionate. And artsy. And dedicated to bringing those who attend their retreats an experience that will rock their world. Many artists will tell  you how important it is to connect with like minded spirits and how many of us say "yes!- I'd love to, but I only know people like me online." How many of us would love to sit and create in an atmosphere created to stimulate our artistic personalities- even caters to them? Art is.. You is like that. It immerses you in a real world fantasy along with all sorts of others like yourselves. I'm frankly amazed at how quickly relationships can spring up in just one, two or three days. How easy it is to nurture your very soul through conversations with like minded people at these events. How the encouragement and experience you receive at an event like this can stay with  you for a year or more. I would like to encourage all of you to attend an event like this. Find one near you, or come to this one. You'll be so glad you did!!!

Now... drum roll please.....my Workshops!!!!!
On Friday Sept. 21st  from 10:00 a.m. til 5 p.m. I'll be teaching a class titled Birds of a Feather you can find the class description here.  Have to say I thought I was pretty clever when I came up with this class. Although technique heavy (cause I want you to get your money's worth) it has the cutest project. Seriously!!!! You will LOVE bringing this home. We'll get to go into the basics of stitched wire sculpture, including an intro to steel wire, how to bend the wire to create shapes, how to add fabrics, how to form wire words, how to create leaves and add dimension, and how to alter the wire with paint to create a distressed appearance. After this full day class you will be confident enough to take these techniques and create your own stitched wire sculptures. I can't wait!!!!

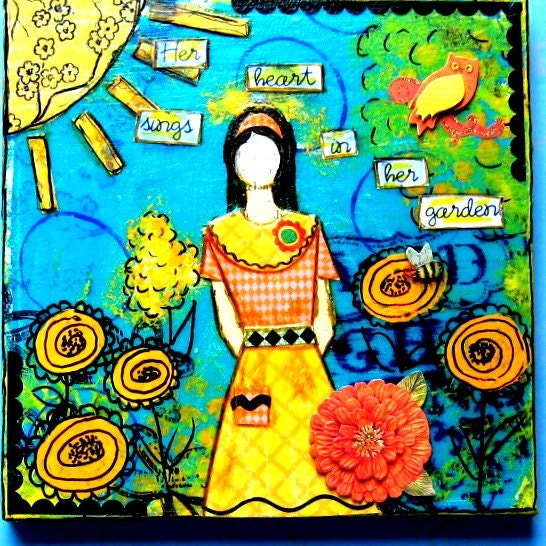
Then, later that same day from 7-10 pm I'll be teaching a 3 hour class called "I AM An Artist". This class is near and dear to my heart. It takes it's inspiration from a project in my book that I love. Originally I created the project after a conversation with a friend led me to think about what it is to be an artist. What I discovered after thinking about it a bit is that truly believe in my heart of hearts that the word "artist" describes a personality type, rather than a job description. We'll talk about what it is to be an artist, how to claim it and how to nurture our creative spirits. We'll also talk about how to cultivate the artistic spirit in our lives, and how to let it permeate our whole lives. As we talk we'll be creating the Artist badge, and the Artist cuff. Keep them both and wear them proudly, or give them away to an artistic friend to encourage them to say it with you- I AM an Artist!!!. To read more about what I believe it is to be an artist check out this post.

These are the two classes I'll be teaching but there are scads more  amazing workshops that span several days. Fabulous instructors will be there teaching truly drool worthy workshops. There are also events both as part of the retreat and going on in the host town of Petaluma. I've heard great things about the Halloween and Vine show, the Art is...you trunk show and all the rest of the good times available. I honestly can't wait!!!!! AND I hope to see you there- we can hang out together. Yay!!!!!

Wednesday, February 22, 2012

Kids Roll- Up Art Kit


I have no idea what these are called- a kit, a roll, a caddy, a portable studio? Whatever the term I've seen them on etsy and wanted to try making one for myself. Then my cute little god-daughter asked for art supplies for her birthday. And that was all the prompting I needed. So as soon as I had the time I decided to see what I could do.

I didn't have a pattern but they looked doable. To be honest I'm not much of a pattern girl yet anyways.They make my head swim when I first see them. I've had my sewing machine for a few months now and am still figuring out how it all works. But it's fun and I'm always up for a challenge. So without pattern,  but with a pic or two from etsy, and a couple of sketches-  ta da! There are still a few things to finish up. The clasp needs velcro, I need some elastic to hold on the glue stick... but you get the picture. :)


Clasp isn't sewn on yet. No velcro in the house.
I thought those who are new to sewing might appreciate a tutorial of how to make something without a pattern, while those who do know- I'd suggest you don't look. I know what I did will probably make your head swim. You'll know way better ways of doing things. I kind of figure stuff out as I go.

 I'll post that how-to in the next day or two. Thanks as always for spending a few minutes of your day here. I appreciate it SO MUCH!!!!

Thursday, February 16, 2012

A Textile Blessing

Anyone who's talked to me in the 20 hours has heard this story. Since it's not everyone I know I have to write a post about it too. It's just so so cool! So you know I've been putting together an inspiration book/manual/pattern book for the women in Peru. I've been working on it for about a week. Although my interest area, computer work is not exactly my skills area. So it's taken way longer then it would for most people. Anyhoo, so I've got it put together, run to the hand off meeting yesterday with a couple of the team that's going down there and running horribly late. But as I was driving I was thinking about one thing.
 
The one thing that popped into my mind was that I wish I'd gotten fabric to send with the little purse patterns my MIL in made up. They're just so cute. Now in my heart of hearts I was wishing I could send some Moda fabrics. I LOVE Moda and would've loved to give the women some for these purses. BUT Moda is a top of the line quilting fabric and way too expensive for me to purchase for this. So I had to let that one go. But I was still a little sorry. 

Now the cool part: I get to the meeting and one of the gals shows me three shopping bags of old fabric her neighbor dropped off. She asks me if there's anything in there we could use and I shrugged and said probably. Not too excited. I've gotten bags of free fabric before and usually it hadn't been used for a reason- not the prettiest or hard to work with, or something. I decide to bring it all home to look at and see if I can make any combinations. I get home, I dump out the fabrics on the floor and start to get really excited. I loved some of the colors and patterns and there was scads of the stuff. So I start to fold and cut and match and what do I see? Half the fabrics are Moda. I laughed out loud. God is so good. He not only provided but even gave me just what I'd wanted most. 

All packaged up and combined with design notes
So there you go- proof that God loves to get involved in even the smallest details, and delights to give us what He can.

Monday, February 13, 2012

Love Notes

Appropriate for Valentine's Day or for any day you'd like to leave someone special a note. These little cards were designed by me and then created by the Art2Heart club of middle and high school students that I help to mentor throughout the year. We're selling them in the boutique and also made 20 some to send to Peru for the people there. They're easy and cute so I thought I would show them to you too.

All you need for these cards is some cream cardstock, old book text paper, a stamp that says "Love", a couple of inkpads, some envelopes, a pencil, and a glue stick. 

Simply stamp your word "Love" on the book text and then tear it out. Next, glue this to a piece of cardstock cut to the size you want. I just cut a sheet of 8 1/2" x 11" paper in half to create two pieces that are 8 1/2" x 5 1/2". Then, swipe your ink pad around the edges of the card and do a little doodling around the edge with a pen or pencil. Easy peasy, and so so cute. The handcarved stamp I used is one that I made a while back. If you'd like to make your own stamps check out this tutorial I did last year. 

Happy Valentine's Day Everyone! 
I <3 You Lots!!!

Saturday, February 11, 2012

Flores de Villa Peru

I'm busy trying to get an inspiration packet together for the gals headed to Peru next week. So the people they're going to visit next week are on my mind. I thought it'd be fun to share with you the website and some pics of the place they're headed.
The group I know that's going there is connected to a local church here in MN, but the mission program in Peru that they work with is Peruvian Partners.

I pulled this off of the website. It's a brief history of Flores de Villa:

Street View
"The pueblo joven of Flores de Villa is located in the outskirts of Lima, a city of eight million people in Peru.  Previously, a few pig farmers, a garbage dump and a landfill occupied the area.  Squatters invaded the area in 1992 much to the consternation of the local authorities.  However, due to tenacity, desperate need, and the passage of time, these squatters now hold property titles for each 90 square meter lot where they have constructed their cardboard/scrap plywood homes with dirt floors.  Now, most have electricity and some just recently were connected to water and sewage." - August, 2009.
Casa Darling

 Here's a pic of the girls' home they've established there. Besides the girls' home, there's a boys' home, and a medical post. The group has brought the bible, and there is a vibrant bible study group. People with different experiences believe differently in Jesus I think. It's easier for those in desperate situations to cling to Him as their all in all. That sounds like part of the miracle that has happened here.

If you would like to know more about this mission, see some more pics, or donate please visit....
Also, please say a prayer for the group that is going down to teach English next week. Also, they'll be working with the women over their lunch hours to train them in some of the projects we have as well as to help them set up their micro business. Please pray that they are effective and are kept safe. Thank you!!!!

Friday, February 10, 2012

When God Connects the Dots

Project example
I was teaching some women last week how to make my wire flowers. They will in turn,  be teaching some women in Peru next week so that they can make them and sell them and BUY GROCERIES. I have no idea how my life got this cool. You think as an artist sometimes that you don't matter much. I mean you don't cure cancer- you make pretty things. Then God takes the gifts he's given you and does some totally amazing u turn in your life and you just hold on for the ride. Working with Art2Heart has been an experience like that for me. The story of how I was connected with them is kind of cool so I thought I'd share it with you.

Here's how it came about:
 I meet through etsy another local artist. It just so happens she's in Plymouth- hey, I'm in Plymouth. She mentions an arts ministry she's part of. It just so happens that I knew vaguely of this ministry because my son's school supports it through their art club. Turns out her kids go to the same school!
Project example
It was a dot to dot we were following and slowly a picture has emerged. It's me, getting the HUGE privilege to make a difference in lives a world away because of this group. I have way too many ideas. More then I can really do anything with. I figure they come from God and he lets me start them out. But I don't think he wants me to keep them all to myself. I think in his great goodness that he's allowed me the opportunity to connect with this ministry. I have no ministry background, I couldn't have done anything like this on my own. They were already plugged in and ready- they just needed a few more ideas. Again, how cool is God?

Thanks again to all who commented on my post about this project before.You were all SUPER helpful and I just want to make sure you knew it. Someone named Rabbit posted a reply that totally made me think about this in a whole new way. Thank you! Someone else mentioned banners- we're working on that. Another suggestion is little purses- thanks to my Mother-In-Law (who reads my posts) we have completely original patterns available for them. AND she stepped them out with examples of each stage as well. I'm in awe. Someone else suggested hair accessories. THANK YOU! As you can see, I've taken that one and run with it. I think I like the little headband the most. But here's a cute little hairclip as well....

So this week my goal is to create a book of inspirations, designs, directions, and templates for the missionary team to take with them to Peru. The women will put their spin on some of these products, use what's available to them, although we'll bring some supplies as well. That's part of the coolness. Anyways, here are some of the designs I've been playing with. Just so you can see what I've been up to. :)

Thursday, February 9, 2012

I LOVE this Magazine!!!

So for the first time I found a Greencraft magazine in my mailbox the other day. Flipping through there was so much cool cool stuff and the fun part? I knew I had an article in it.

 I've always secretly wanted to be in this magazine. I mean secretly since it premiered a couple of years ago. Ok, pretty much from the moment I first laid eyes on it. Everything in it has been repurposed some how. And everything in it is always so clever and cool and I really really look forward to it's release.

My own little Wizard of Oz collection
For instance, in this issue: There's jewelry- Amazing jewelry. I particularly love Melony Bradley's toe tap pendants. I keep thinking about how absolutely brilliant they are. There are gorgeous clothes made from linens, and hooded coats made from sweaters.  And absolutely fabulous gift ideas, super cool recycling ideas like the wreath on the cover... the list seriously goes on and on.


My publication in this issue was the happy result of a dual challenge. Greencraft had  a call out for projects made from vintage books. I'd done books before and love using them so I was all ears. But then I thought about it and realized I couldn't submit what I'd done before.I decided to make it a self challenge as well and really push myself to come up with something I hadn't done before.
Wizard of Oz jewelry- what's not to love?

What I ended up mailing off to Stampington was a dissembled book. I took a classic, The Wizard of Oz, and used the cover to make a notebook, the spine and some text to create a brooch, and one of the illustrations to make a pendant. I've had a hard time not sharing these with you. I really liked how they turned out, especially the necklace.


And that was something fun that happened to me this week. Thanks for letting me share. :)

Tuesday, February 7, 2012

Local Craftiness Revisited!!

A while ago when I was posting a wee bit more regularly then I have been lately, I started a series called Local Craftiness. In it I introduced you to some of my friends who have Etsy shops. Well, it's been a while and some of these friends have completely changed up their products, or updated their shops, so I thought another visit was in order. I also have a new shop to introduce you to. I hope you'll take the time to peak at their goods and show them some love. Just hearts can mean so much in the beginning (I bet some of you have etsy shops and you know how it is. You do a big "whoo-hoo" for each and every favorite you get). So let's take a stroll and pretend we're perusing their shops together. We would have SO much fun together- I know.
So Vintage-y Cool!
These are my parent's shops! The Old Shop Teacher sells a fabulous mix of vintage and vintage repurposed. My dad has a complete knack for making the best discoveries at garage sales, barn sales, rummage sales, you name it and he loves to shop it. I have to admit not all of his fabulous finds make it to the listing stage. I nabbed a whole box of vintage lace that he found last summer (and I'm not sorry at all). My parents are teachers so over the summer they were able to put a lot of time into the shop and have some really cute things there now. My favorite is still my Mom's Globe Lamp. They also give a percentage of their profit to the same orphanage in India that I do. I like that.

Perfect for a gardener friend..
Although my Dad is creative in many ways, my Mom is artsy in the paint and paper and glue sense. She started a shop called Fleeting Whimsy not long ago. She lists some of her mixed media works and bravely lets them go out into the world to find a home. I'm really proud of her for having that courage, and really amazed at how she's taken to the whole mixed media concept!
I wish you could all meet, Karen, the owner of The Mad Stamper Etsy shop. She is the cutest EVER! You kind of just want to squeeze her whenever you see her. And what she makes reflects her sweet little self- the cutest ever! She started her etsy shop in the hopes of selling a few of her stamped goods. She bravely listed, and I still remember when she made her first sale. It was for something like $2.60. She was ecstatic, her husband was a bit sarcastic. Not much profit there. BUT, I hope he's apologized since because this girl has taken her love of paper and ink and created amazing things (and made quite a few more sales since). I LOVE her little tags, and her Sweet Baby banner completely made the baby shower I had this fall. Her wedding banners are selling like hotcakes and I can see why- can't you? SO SO CUTE!

My Sis-in Law's baby shower

And Introducing.... Pillies Frillies
I <3 Snoopy- and this bag!
Pam is another friend who I've known for years. She is one of those people that always has a project, or two, or three. Last March  she was losing some of her disability income and wanted to know more about Etsy. I had told her some about it and although she was a little hesitant, not really sure if she could do it, we set up a shop. Inventory was no problem; she stitches, knits, and crochets as occupational therapy. So although she wasn't very confident about how it would go, she decided to give Etsy a try."Gangbusters" is the word that comes to mind when I think about her shop now. She truly took the seed and ran with it. She has a huge variety of handmade stitched goods, and  is a fabulous source for vintage sewing items as well. I just bought a lot of vintage binding tape she had- I couldn't resist. One of the things I love about Etsy is that my friend, who is disabled, can make income selling the things she loves to create. She couldn't do the art and craft fairs because of her disability but she can have a thriving shop selling to people around the world, right from her home. That's so cool!
Perfect for Easter Photo's- don't you think?
 

Monday, February 6, 2012

Valentine's Day Heart Mobile

In honor of the approaching holiday, I have a cute little tutorial for you today! It's made of hearts and string dangling from a wire wreath frame that's been spray painted cream. I made it in about an hour. Super easy and I think Super cute. Which is always a win in my book! So take a look and see what you think- would you  make this?

Mobile Tutorial- Hearts Dangling from a String 
(not a country western song) 
Tools and Materials
1/4 yd. of heavy canvas
1/4 yd. of fabric of your choice
Fusible interfacing
12" Wire Wreath Frame (found in floral dept of craft store), sprayed cream (Rustoleum)
String
Scissors
Iron 
Sewing Machine w/black thread (optional)
Crop-a-dile (optional) or hole punch
Create Your Hearts
Step One: Pick out a cute fabric for the hearts and apply fusible interfacing to back of fabric, if desired. This makes the fabric super easy to cut into shapes and if you want to, you can even sketch them out before you cut on the paper backing of the interfacing.  Cut out heart shapes.Peel off backing paper. Note: You could probably use a die cut for this but I like to vary my size and shapes so I  hand cut mine. 


Step Two: Arrange hearts on canvas piece. Iron in place. You can now either skip to Step three or you may choose to stitch around your hearts. I like the scribbly border free motion stitching on my machine adds to the finished look of the hearts. I did not love the scribbled thread mess that's on the back of my fabric when I'm done stitching however, so I added another piece of fusible interfacing to the back of my stitched canvas. Then ironed another piece of plain canvas to the back of my stitched piece. This gave me a simple, plain canvas backing to the hearts.

Step Three: Cut out around heart shapes leaving some of your canvas backing as a border. 


Assemble Your Mobile
Step Four: Punch a hole through the top of your hearts. This can be either right in the middle or from one side of the heart or the other. I mixed it up so that some of my hearts dangle at an angle. Tie a piece of string to the heart through the hole you just punched. Leave enough length to your string so that the heart can hang down as far as you'd like. (about 6-20") The height of your mobile is up to you, as is the number of hearts you choose to make. 


 Hanging Your Mobile
Step Five: At this point you can either add wire to the top of your wreath form to create an "x" (spray cream again), or you may do like I did... which is figure that out after the fact and have to use what you had on hand because you're doing the final assembly on site. If you choose the second option you'll use your string and tie a piece of string across the middle of the wreath frame, tautly. Then, tie a second piece of string across the frame, creating a +. Where they intersect, tie a third piece of string around both strings where they meet and use this to dangle mobile from ceiling. (Because I was in a school building that has those fake ceiling tiles I was able to attach a paper clip to the end of my string and jimmy it up under the tile edge and over the metal framework holding the tiles in place. The alternative would to hang it from a small hook screwed into the ceiling). 

Here's a pic of the hearts dangling from the wreath frame :)
Thanks for your time!!! Hope you enjoy the project and as always I'd love to see any pics of your version show up on my facebook site. Happy Almost Valentine's Day!

Oh, and here's a bonus pic: the banner I made the same morning to go with the heart mobile. It was super easy and fun too! And I think they both made the teacher's lounge a bit more fun and hopefully gave the teacher's something new to look at over lunch. :)
So fun what a little fabric and stamps can do!