Sunday, May 9, 2010

Happy Mother's Day Mom!!!!

Being a mother has gifted me with the ability to more fully understand my mother. I've always known that she loves me, that she cares and dreams and hopes for me. But now that I have a child I understand how involuntary and all encompassing that love is. You don't choose it. You don't ask for it. You don't develop it. It simply is. It's born within your heart as they dawn on your world. Forever changing it.

This year I bought my mother a special gift. Usually I do a piece of art, or frame a photo, or give her a plant. This year I bought my mother Shona Cole's book, The Artistic Mother. It's a book that she's seen and loved and I'm hoping it encourages the artist in her. So Happy Mother's Day to my Artistic Mother. I love you and thank you for being my mother.

A Happy Mother's Day wish for all of you reading who are mothers too. Enjoy your day and know that you are a blessing!!!

Saturday, May 8, 2010

The Best Kind of Gift

A few weeks ago I sent some wire words to a new blog friend of mine. She's an artist, a mom, a Christian, and an amazing jewelry artist. I started reading her blog some time ago. Not even sure how I got started. But through her posts and the occasional comments on mine, I began to see Cristi as a kindred spirit.

Blogs you know are funny things. You put yourself out there, revealing thoughts, dreams, goals with whoever might happen to look. You write like no one is reading, as a way to process life. Then, you wish and hope that someone is reading because you hope what you said might be helpful or meaningful to others. Finding new friends is the icing on the cake. No one blogs to find friends, but when you do it's such a gift.

The necklace you see above is a sample of Cristi's work. I absolutely love it. The colors are perfect, and there's the cute little bird. When I opened up the cute little matching box (that says "fly") and first saw it I lit up and went "oooooh".

The necklace was a surprise gift to say thank you for the wire words, way way too generous of Cristi. But I love it. I love that it's her art, and she made it thinking about who I am and what I like. The definition of a kindred spirit is someone who thinks and feels as you do. They are rare and wonderful to find. I am so grateful for the necklace but even more so to have found another kindred spirit in it's maker. So thank you Cristi!

To see more of Cristi's amazing jewelry, check out her Etsy site, here. You'll love it!

Friday, May 7, 2010

Tutorial: Altered Tin Heart

Just a little quickie today. I had kind of a rough day yesterday (and the day before, and the day before) and today's the make-up. It's decided. It's been so dreary and rainy and I'm completely effected by light so things that usually wouldn't have been hard have been difficult. So to perk myself and maybe you up as well- here's a super quick and cute idea of altering a tin heart. Where to get a tin heart? You could try a flea market, or major craft stores sell rusty cut out hearts. I used one of my old cream lunch trays and simply used Tim Holtz's tonic scissors to free hand cut it out. He claimed they cut metal, I checked, they did. Then hit the edges of your heart with either heavy duty sandpaper or a metal file to smooth away any sharp points (sounds like a metaphor doesn't it?).
-----------------------------------------------------------------------------------------------

Altered Tin Heart: An Easy Way for Applying Text and Imagery to Metal

Materials and Tools
A tin heart
Rub-on's ( I used Pink Paislee)
Craft Stick or Rub-on applicator
Crop-a-dile with grommets

Step One: Use your Crop-a-dile to punch holes in the top of your heart as shown in the photo at right. Then use the Crop-a-dile's grommet setting function to set grommets in the holes. For the how to of using a Crop-a-dile check out this Youtube video here, or a past post using this tool, here.


Step Two: Select your rub-on's and remove their protective protective backing sheet. You should be able to lightly touch the back of the top piece and feel the rub-on's there. They'll be slightly tacky. You may decided to cut out the rub-on's you've decided to use from the rest. (This is important when you're using a rub-on alphabet collection to spell a word- you don't want to accidentally transfer three "e's" when you needed one). Lay your rub-on onto the heart where desired and using the flat side of the top of your craft stick begin to rub-on. As the rub-on releases from the top plastic it should turn cloudy. It will appear crisp on your tin surface.


Step Three: After rub-on your first image, overlap that area with a second image. The Pink Paislee set I'm showing were wonderfully distressed looking to begin with so I was able to do partial transfers and overlap without worrying about the quality of my transferred image.

Step Four
:
Finish it up! When I worked off the edge of my tin adding rub-on's some of the rub-on extended over the edge. To clean up the edge I used my hand to gently wrap behind or wipe away anything that protruded. Then place a clean piece of plastic, and with a cloth, or your rub-on stick gently rub over your completed transfers to make sure they are all adhering completely. If you want to distress even more, skip this last part and instead hit your surface with the sandpaper again. Sand here or there, or even slightly hammer the tin to give it a mottled appearance.

Thursday, May 6, 2010

Easy Gift Wrap Ideas from your Recycling

Scenario #1: You've got the gift bought and you're ready to wrap it and OH NO! Not a shred of tissue paper/wrapping paper left in the house- What to do??? You run back to the store, shell out another $8-10 on a card and a bag (not forgetting the tissue paper) and wrap it in the car, in the Target parking lot. You are, of course, late to your event, and there's tape stuck to the back of your dress.
Scenario #2: You've got the gift bought and you're ready to wrap it and OH NO! Nothing to wrap with. But you're crafty and don't despair because you know there's SOMETHING in the house that you can make look good. You walk over to the recycling bin and take a look and find a few tin cans, some saved brown paper grocery bags, and assorted boxes. A little paint or glue, some ribbon, and you've all you need for a fantastic presentation. Go to it girl!!!

I've had a few occasions to buy gifts for lately and have made the commitment to using recycled materials to wrap them with.The purple can? the previous night's fire roasted tomato's. The paper wrapping? Grocery bags.
Here's a birthday card I did up recently- I cheated with this and used some left over scrapbooking papers and letters I had on hand. But the inside of the card is a page torn from the flyleaf of an old book and technically the button is a found object.... :)

There really are so many options. Sew an old sock shut, use a toilet paper tube, Shona Cole and Lisa Guerin had a fabulous article in the first Greencraft about transforming old cereal boxes into beautiful gift bags. Following their cue, I prepped up a bunch of boxes recently and am embellishing them in my spare time. My hope is to get a small stockpile started so that when I do need a quick bag or box I've one on hand and can avoid that last minute rush to Target. Hopefully this post has given you some ideas too!

Wednesday, May 5, 2010

SWEET! My Shop on Handmade Spark!!!

Handmade Spark is a blog/e-newsletter I mentioned several posts ago that I LOVE and read every day and today I'm super excited to have found out that my etsy shop is featured as Today's Spark. I AM SO EXCITED by this. I really admire the work that Tim and his staff does promoting and encouraging the handmade community and to be part of that is really an honor for me. So THANK YOU Handmade Spark!!!

You can check the article out here. YAY!!!

Immortalizing My Favorites

Every once in a while, I'll find something I love so much I'll want to compose an ode about it.
Unfortunately, or fortunately, I am a horrible poet so nothing ever rhymes and I never get very far, but the sentiment is there. A couple of things I've felt like composing about lately are my crop-a-dile and my new 7 Gypsies Venice gaffer tape set. I love them both.

Ode to My Crop-a-dile
I love my crop-a-dile, it works with such ease, and it chomps through metal like butter.


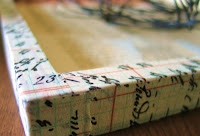
But my newest love is the 7 gypsies tape. I had a little free time yesterday so I was going to try adhering the broken pieces of carpenter ruler around my shadowbox frame. I've had trouble with that lately, I don't get a strong bond. But then my eyes lighted upon my new tape and I had one of those moments where an idea comes, and it feels slightly audacious. Would it? Could it? Will it work?

It did. I was able to use the tape to cover the edges of my frame and honestly, it looks fabulous. Then, when I was trying to figure out how to attach the copper sheeting I wanted to place behind the word "soar" I reached for my tape again. Using one of the other patterned styles that came in the set of three. So easy and I like the taped on look.

So I have yet to actually compose an ode to my tape, but I am certainly in love.

Author's edit: OOPS!! Forgot to mention my Craft Sheet- LOVE LOVE LOVE it!!!

    Tuesday, May 4, 2010

    Creative Storage Ideas for Art Supplies

    Storage is the problem all of us artist's seem to share. Not only do we lack it, but we want it (when we get it) to be attractive. I've been collecting tin cans, cereal boxes, old metal trays, boxes, books, and papers for a while now and my collection piles are starting to get pretty precarious. My husband and I have started to hear odd noises in the night. Although at first we were puzzled, I've realized that the sounds can usually be traced back to something in my studio falling over. Or off the wall, or the shelve, or out of the closets. You get the idea. My piles of junk are toppling over.

    I've started to take action. A couple of posts ago I showed you my new shelf inserts to seperate my fabric pieces. They insert right into my Expedit book shelf from IKEA. I love how that looks now. But what to do about all the little things? I did buy about 5 drawer inserts as well that hold the smaller items that had just been piled up on the shelves. Now there's no more toppling. In the photo you can see my cigar box of colored pencils, and my watercolor crayons, even some glitter mists fit into just one of the drawers.

    Then, when over at my parents I found the cutest storage solution for all those supplies that you'd like to keep out on your desk but don't really have a spot for. My mother had an old tin lunchbox that she converted into a little art caddy. Now to find a lunchbox of mine own...

    For those big 12 x 12 pads of paper I found an old file cabinet for $2 at a garage sale that I use. I liked the color of the green paint but one day decided it needed a little embellishing. Luckily, I had a decal from Single Stone Studios that only took a minute to apply, and now that cabinet totally makes me smile whenever I enter my art room.

    So there you go! A few more ideas. I'd love to hear more from you!!! What have you done to organize? Have you seen any cute ideas? Or transformed a storage container from drab to fab? We could all use some more ideas, so please, leave a comment and links if you have them!!! Thanks :)

    Monday, May 3, 2010

    Scams that Target Etsy Sellers

    So I received another convo from a supposed Etsy buyer this morning. I've gotten about 4-5 of these now and although they vary somewhat it's not that much. Here's the convo:
    My name is _________ and am interested in purchasing your (item) with no
    delay,but first? Is the price firm?Or how much are you taking?Will you be
    accepting a US certified Check or money order? Contact me with the present
    condition of the item and your contact information to mail out the payment to
    you as soon as possible. Name you want on check: Home Address:
    City: State:zip code: Country: Phone Number/Office Number so plz if you are
    interested in selling your item to me reply to my e-mail xxxxx@xxxxxxx

    One variation is that they're traveling and would like me to send them my bank account number so they can transfer money. It's a scam. Each and every time when I look them up on Etsy the profile either doesn't actually exist OR they joined Etsy either that day or the day before. I'm not great at spotting phishing scams or the like but it's getting pretty easy when they're all pretty much the same. It's almost always my highest priced item that they are proposing to purchase (my wire jewelry tree). I guess that's the snag. SO I thought that I'd mention it to you all today and make you aware. I know there are people out there preying on artists and writers that have lots more evolved hooks than this... ie self publishing, or marketing, or the like, but this is the one I see most. When I get one of these I just ignore it. The first time I wasn't sure what it was so I e-mailed the person asking for specifics. The next e-mail they sent was extremely transparent, so I didn't continue communicating. Since then they're all pretty much the same as the example above. So that's my public service announcement for today. :) Hope you have a great Monday!!!

    Sunday, May 2, 2010

    Local Craftiness: Craftstraganza

    I know you're all dying to know what I found at Craftstraganza on Saturday.;) I can show you a couple of things but the last is a birthday gift for my husband. I wouldn't want to spoil the surprise so I'll show you that another time. But here's what I did get...

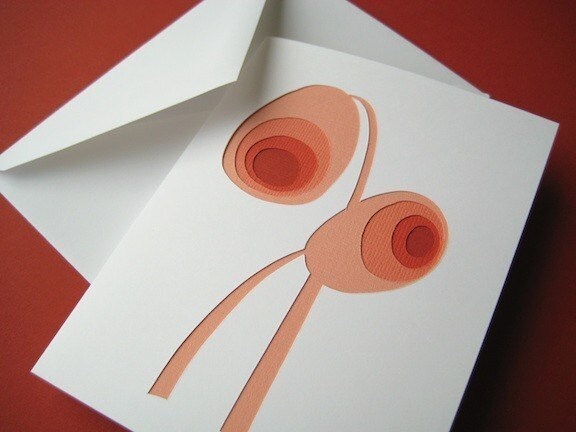
    First of all, I got another fabulous pillow for my couch. Last post I showed you the pillow I bought last year from Katie Benson. She was there again with a pillow that was from the same line as the one I had (Safari). So I immediately snapped that up. I also found this adorable little head scarf from one of the vendors, who I'm a little embarrassed to say I can't remember who they are. I also purchased a hand cut card from Crafterall. Love it! We'll see if it gets sent...

    Have to say one thing I noticed though was how much fabric was there. Whether it was clothes, hats, bags, or stuffeds, the majority of the vendors seemed to be working with fabric. There seemed to be a lot that specialized in children's apparel as well. I just walked around feeling more and more fortunate that I had a little boy and not a little girl. There was waaaay waayy too much cute girl stuff. I'd go broke, my marriage would be in shambles... all because I would not be able to resist the cuteness. I mean check out this cute little fairy house by Lucky Nielsen. Little miniature works of art. Alas, there was no Squishy. That vendor didn't participate this year. Still everything was just too Too TOO CUTE! Plus, it was a fabulous time. SO if any of you get the chance to check out a rogue or indie craft fair in your area I'd highly highly recommend that you do.
    Happy Monday!!!

    03 by Lucky Nielsen.


    Author's Edit: To find a local event where you live, the people over at Indie Craft Shows has compiled a directory that is searchable. You can also add your local event!

    Saturday, May 1, 2010

    The Art of Selling Crafts

    So I happened to stumble upon this article on Good titled Six Tips to Become a Craft Show Superstar and thought that in honor of the fact that I am at this very moment shopping Craftstraganza (give me a whoo hoo for scheduled posts) I'd share the article with all of you. I'll update you later today on all the goodness I found at the show.

    Also, although I'm going to be out of town next weekend, I think all you locals who can, should head to uptown for Handmade MN's Spring Market. It's their first big show together and looks like it's going to be fabulous. I really wish I could make it. For more information check out the Handmade Mn blog here.