Showing posts with label junk art. Show all posts

Monday, May 31, 2010

The Old Shop Teacher and my Mom

So each year when garage sale season starts my dad starts to come home with all these little knick-knacks and bits of things. "Can you use this?" Or "I thought you could use this-" are phrases I began to hear a lot of. The thing is that although I couldn't use them all he finds some really cool stuff. After he'd come home with a stash of skeleton keys, a ton of buttons, some really fabulous old wooden things, old bottles, etc. etc. I told him to open a vintage shop on Etsy. He thought about it a bit and recently we set up a shop for him, The Old Shop Teacher.

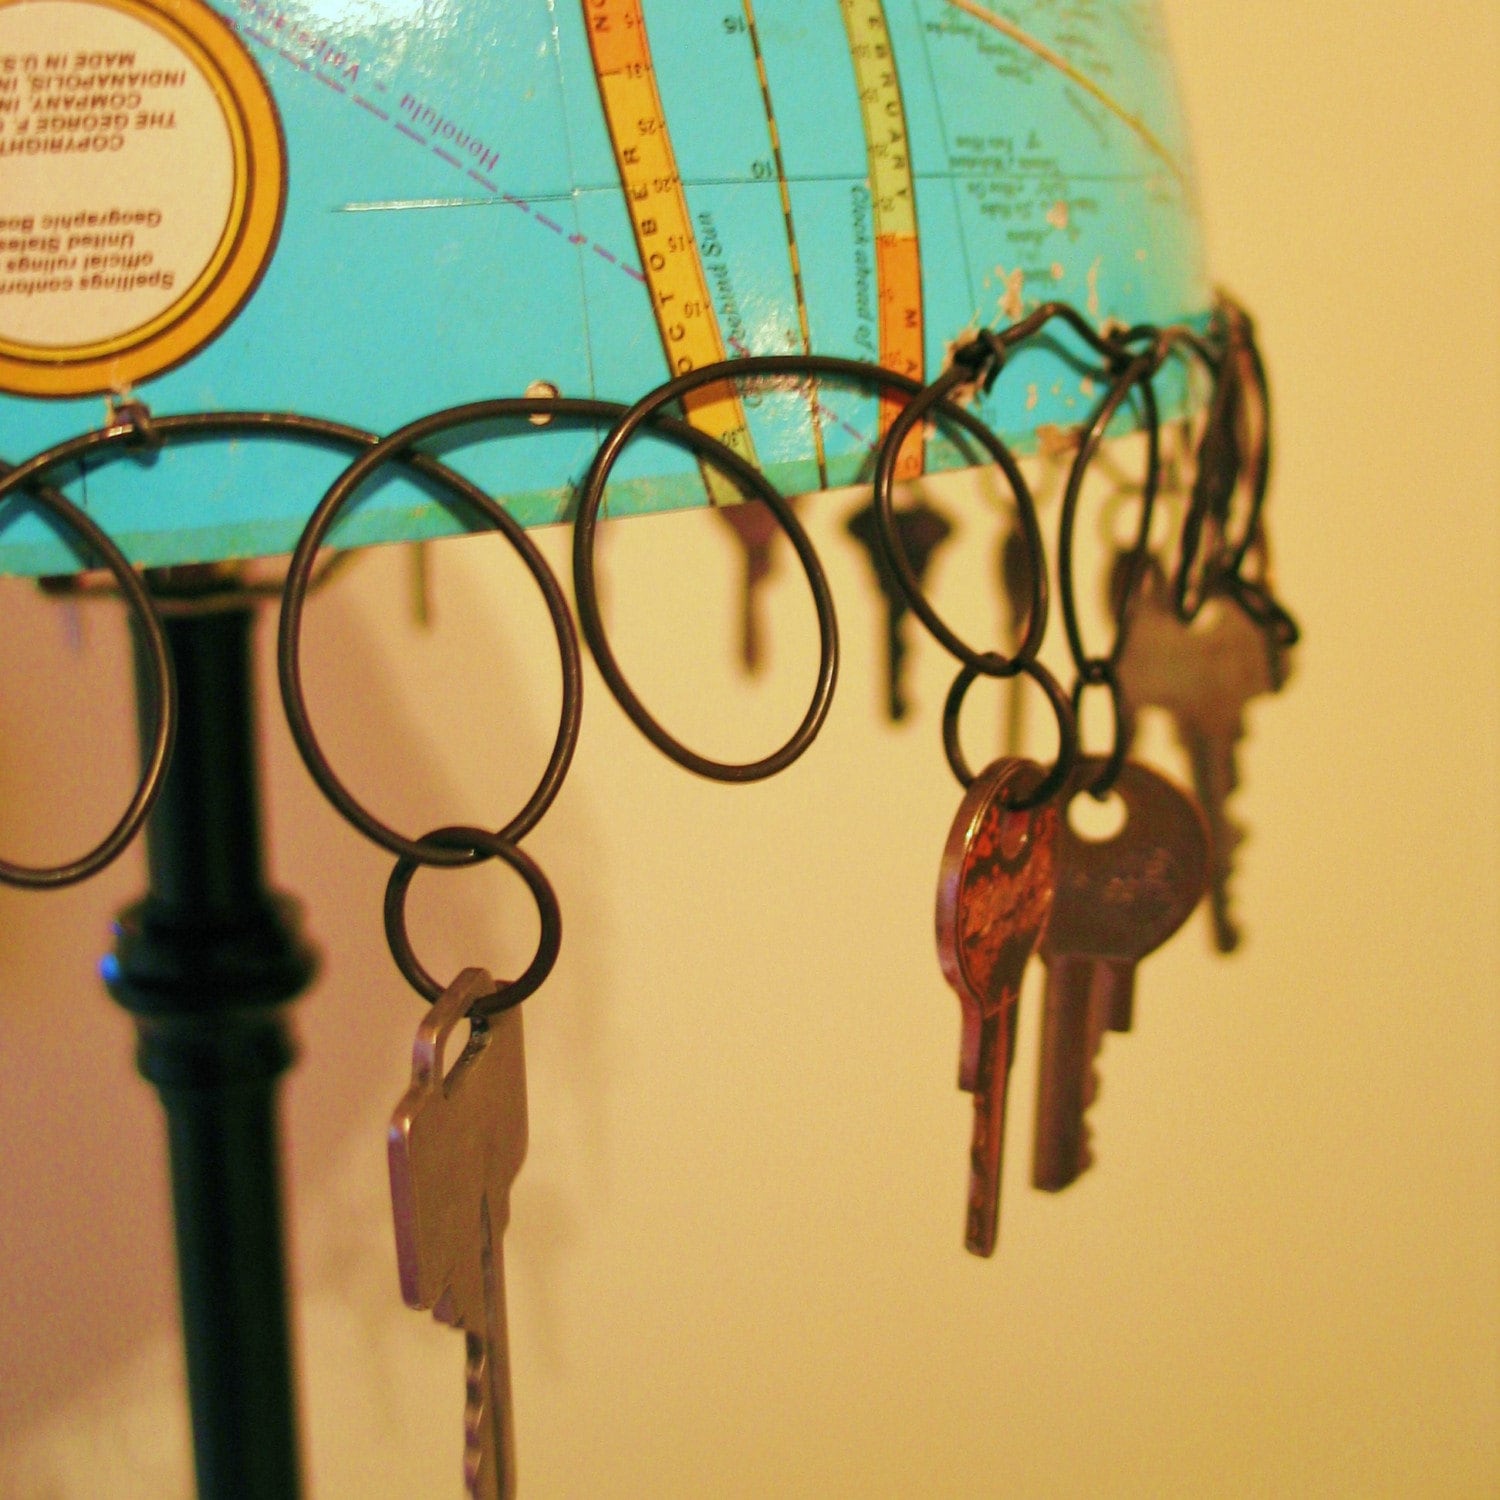
But what really makes it a great shop is that my mom is adding some of her art made from vintage items to it. Years ago she made an amazing lamp for the spare bedroom we sleep in when we visit. It's made of half of an old globe. I love it! She recently made a couple of more and has offered them for sale in the shop. And there's nothing else like it on Etsy- it's truly an original.

She's also been crafting these fabulous clipboards from a stash of vintage one's used in the high school my dad teaches at. They have a beautiful patina from years of use and I love that she doesn't over do it with the decorations/ribbons so that you can still see the old metal clip. I particularly love the one at left. She used paper from October Afternoon that has a map of MN on it. Then added a little red car traveling up 35W which is the road to Minnesota's North Shore- one of our favorite vacation destinations when we were kids. Although these work great as clipboards, I love seeing them displayed as photo frames.

My parents are both teachers and soon to be done with school for the summer so expect some more amazing finds and fabulous vintage creations soon!!!

Wednesday, May 26, 2010

What to Do with an Old Metal Wreath Form

Last week I went to a HUGE sale for charity that my dad organizes each year. I came home with one box full of tin lids- just tin lids. They were going to crush them down and toss them at the end of the sale so I "rescued" what I could from this terrible terrible fate. Then there were the books. Three huge tables of paperbacks, encyclopedias, cookbooks, self help books, you name it. I grabbed the most vintage-y looking of them. Then as I was getting ready to go I saw a pile of metal wreath forms. Metal of any sort attracts me and although I couldn't think of anything to do with them I knew I needed (ok wanted) one to play with.

Yesterday as I was unpacking all the sale things I brought home I pulled out that wreath form and started to think about it.

What could you do with a metal form? You could turn it into a hanging candle chandelier, you could wrap it with lights and suspend it, you could wrap it with fabric or moss. You could use it like stretcher bars and stitch canvas to it to make funky framed art.... Or you could go with the obvious and use it as a wreath form. I really wanted to see what I could do with it that would add to it yet not take away from the shabby chic charm of it. So here's what I came up with.

A couple of stitched branches, a bird, and some ribbon. Not much and maybe I didn't even need the flower but it covered up the wires attaching it all.... So there's answer no. 1 to the question of What to do with a metal wreath form. Now I'd like to get my hands on a few more and try some of those other ideas out.... Know of any good garage sales coming up??? ;)

Tuesday, May 4, 2010

Creative Storage Ideas for Art Supplies

Storage is the problem all of us artist's seem to share. Not only do we lack it, but we want it (when we get it) to be attractive. I've been collecting tin cans, cereal boxes, old metal trays, boxes, books, and papers for a while now and my collection piles are starting to get pretty precarious. My husband and I have started to hear odd noises in the night. Although at first we were puzzled, I've realized that the sounds can usually be traced back to something in my studio falling over. Or off the wall, or the shelve, or out of the closets. You get the idea. My piles of junk are toppling over.

I've started to take action. A couple of posts ago I showed you my new shelf inserts to seperate my fabric pieces. They insert right into my Expedit book shelf from IKEA. I love how that looks now. But what to do about all the little things? I did buy about 5 drawer inserts as well that hold the smaller items that had just been piled up on the shelves. Now there's no more toppling. In the photo you can see my cigar box of colored pencils, and my watercolor crayons, even some glitter mists fit into just one of the drawers.

Then, when over at my parents I found the cutest storage solution for all those supplies that you'd like to keep out on your desk but don't really have a spot for. My mother had an old tin lunchbox that she converted into a little art caddy. Now to find a lunchbox of mine own...

For those big 12 x 12 pads of paper I found an old file cabinet for $2 at a garage sale that I use. I liked the color of the green paint but one day decided it needed a little embellishing. Luckily, I had a decal from Single Stone Studios that only took a minute to apply, and now that cabinet totally makes me smile whenever I enter my art room.

So there you go! A few more ideas. I'd love to hear more from you!!! What have you done to organize? Have you seen any cute ideas? Or transformed a storage container from drab to fab? We could all use some more ideas, so please, leave a comment and links if you have them!!! Thanks :)

Monday, March 1, 2010

New Art Coming Soon!!

I'm getting really excited by all the new things I've been working up for Etsy! I plan to reopen the shop either later this week or early next. YAY!!!!

Here's a look at another one of the trays I've been playing with. This one has the word "sweet"written in wire and then attached to it. The added 3D element really made the composition for me. Fun!

Here's a picture of it up on my wall. To hang I used E6000 to glue on a little sawtooth hanger. The tray is insanely lightweight so I think it should work beautifully. SWEET!

Wednesday, February 24, 2010

Tutorial: "love you" Altered Book Photo Frame

Wondering how to say I "love you" with an old book, wire and a bit of fabric and ribbon? Here's an idea- How about creating this hanging book photo frame?

In
Taking Flight, Kelly Rae Roberts had a photo frame project that I took this basic technique of cutting out a rectangle from the front cover from. It's worth checking out her version- it has some lovely wire and tissue wings.

Altered Book Photo Frame

Tools and Materials
Old Book
Wire words, "love" and "you" of 16-gauge steel wire
Ribbon
Patterned fabric or paper
Embroidery floss
Utility knife
Awl
Needle
Scissors
Glue stick
Craft Drill

Directions:
1. Decide whether you want the front of your frame to be the front cover or back cover of your book. Sometimes the front is too distracting and the back cover seems to be the best option. Using an utility knife and a ruler; measure, mark and then cut a rectangle from the front or back of your book. I cut right into the book, no mat needed. Pull out any cut up pages from the interior of the book.

2. Cut ribbon strips and glue around your frame window. Position your wire word "you" beneath the frame window, and then use an awl to poke a few holes through the book cover around the word. Usually one hole on one side of the first letter, a middle letter, and the last letter are enough.


3. Using a needle and embroidery floss (knotted at end), come up through the first hole, cross over the wire, and then insert the needle back through the same hole. Repeat once more and then move on and stitch down the next letter in the same manner. For the word "love" repeat steps 2 & 3 stitching it to the top of your frame.


4. Using a craft drill with a 1/16" bit, and drill two holes, one in each of the top two corners of the book. Drill through the entire book block. Open book cover and glue in the patterned fabric or paper in place behind the frame window. At this point some instructions suggest you use matte medium to seal the edges and cover of the book closed. I find that inserting the wire for the hanger wires the book closed very securely- no glue necessary.


5. Using the 16-gauge steel wire, insert the cut end through the top right hole and then pull through, insert through the hole on the left side of the book and then wrap cut end around wire at the top of the book. Leaving some slack in the wire, cut the wire on the other side and then wrap the end up and around the wire as you did on the left side of the book. Place your photo of choice in the center of the window attaching with glue dots, and then hang on the wall. Enjoy!!!

Wednesday, February 17, 2010

Junk Art- Using Old Trays in New Ways

Wondering what to do with all those old metal lunch trays you have lying around the house? Ok- so you probably don't have that problem, but I did. Last spring I was at a charity garage/rummage sale my dad runs every year and was about to leave, when my dad tossed me an old tray. He had a stack of them and thought I would want to do something with them. I didn't- they looked pretty hopeless, I mean they weren't even a pretty color, just a rusty old cream.

But I took a couple anyways and when I got home I played around with one of them.
My first idea was this memo/magnet board. It turned out kind of cute so I called my dad and asked him to save me the rest of the trays- if they were still there. They were. :) So I got the whole stack.

The memo board came together really quickly and didn't require much in the way of tools or materials either. Some fabric scraps,embroidery floss, a little memo sign, a scissors, glue stick, and my trusty Crop-a-dile were all it took. The Crop-a-dile is my favorite tool ever. It chomped through the tray like butta'. So I went a little crazy and chomped holes on each side of the tray, but then I was able to thread floss through them and give the edge a stitched look. The magnets are buttons stacked and tied together with butcher's twine with a magnet stuck to the back. Easy and cute!

I didn't have the time to get back to the trays until yesterday when I grabbed one and started to play around with an idea I'd had. I wanted to use the tray as a base for a fabric collage. It turned out to be super easy and the result was pretty cute so I thought I'd share it with you. I thought maybe you'd like to make your own. I mean- there's a shortage of inspirational signs made of old lunch trays in the world. Right?


Saturday, November 14, 2009

And then there were TWO!!!

So the angel I created on Thursday night was so fun I went ahead and made another one yesterday. I don't think she's quite done yet but she was loads of fun to make. I love the idea of using art materials in my sculpture- not just to create it but to decorate it as well. So yesterday I grabbed a whole bunch of dried up Golden tubes I had left over from college and tried to wire them on to this girl's skirt. It ended up being a little too bulky seeming- but still a cool idea so I think I might have to work with it for another piece. Instead of the tubes of acrylic this little girl got a Tim Holtz ideology pendant that's stamped with the word "believe" and some yummy little clay fragments I had in my stash.

The fragments were made by Teri of Terraworks studio on Etsy, several months ago. I'd had the idea of creating a wire ball and then stitching in the clay pieces but the clay sticked out a little too much when I tried it, upsetting the rounded shape of the ball. Which I hated admitting to myself because they were just too cool. So I reluctantly set them aside trusting that I'd find a place for them in the future. And wouldn't you know they are the perfect accents for this angel. I love her so much more with these little fragmented bits of art wired into her skirt. They help to give her a personality and I just love that.

So now the ideas are just flowing in and I want to try all sorts of things with this form. But not today. Today I have to work on writing the introductions for each project in the book. So I will stop using you all as an excuse to procrastinate. Have a good weekend!

Sunday, September 20, 2009

Local Craftiness: Crazy Fun Weekend!

Sometimes you only have time for one load of laundry, do you yours or your kid's? I chose to do Jasper's and ran around town wearing whatever seemed cleanest all weekend. But it was an awesome few days. I started it early by throwing caution to the wind and taking my son to Junk Bonanza on Thursday for the Blogging Party. I sound dramatic but it's a big risk taking a 4 year old with to an event like that. Fortunately God smiled on me and I thought to call and invite my cousin to join us. We played tag team with Jasper and I got to meet some fabulous craft personalities.

What I liked best however was meeting some local gals who I'll introduce you to in my next post. Fellow moms like Jill Hinson (who created the Thrify Mom's Challenge Table- which rocked), and artsymama (blogger extraordinaire!). I was completely blown away by the creativity of the vendors as well. I saw a bit on Thursday and then returned on Saturday morning with a friend to see the rest. When I got home I filled 4 sketchbook pages with ideas I had and sketches of what I'd seen.

Two hours at home and then it was off to Scrapfest 2009 at the Mall of America. I'd registered for the Stylish Standing Desk Calendar workshop sponsored by Me and My Big Ideas. It was a good little project and I liked that they gave us a lot of extra materials. We got the majority of it done right there in class and I'll finish the rest up sometime this week. I took the class because I eventually would like to teach classes like this and wanted to experience one first. So between the blogging party I attended on Thursday and the Scrap class on Saturday I feel like I really did some positive things for my future art career. Yay!

Monday, May 18, 2009

Discovered Treasure!


I've been pretty taken with the whole flea market look that's been everywhere lately but have lacked some of the materials to play much with it. This weekend though I was treated to pretty much anything I wanted at a charity garage sale. Everything was amazingly cheap and because it was my birthday my dad (who was organizing it) let me fill up a couple of boxes and paid for them as his birthday gift to me. YAY! There were about 20 long tables full of donated items and some of it was complete junk, but much of it caught my artist's eye as full of possibilities.

First, my dad directed me to a craft table and someone had apparently decided to drop the stamping hobby because there were boxes of slightly used stamps, completely unopened findings, some Tim Holtz decoupage materials, some 7 gypsies chipboard and cloth stickers, and a TON of ink pads and embossing powder. Some of the ink hadn't been opened yet and came with a bottle of ink refill taped to them as well. There was also some of those big clunky punches in a couple of pretty scalloped squares. It was so much fun to go through it all! I love getting art supplies for a present!!!

Then I started to browse the rest of the sale. There were some really pretty old green metal trays in a pile by housewares and in the dishes section I found a beautiful chipped red glass compote. I can't wait to put lilacs in it and see them drape down. Lovely! Then I found some old books, some corkboards, and an old green filing cabinet for $2.

I loved the green of the cabinet but knew that talking my husband into letting me bring it into the house would be a daunting task. Try as I might to avoid it though, I really felt drawn to it. So right before I needed to be done and take Jasper home I just walked over and opened it. I pulled the top drawer back and looked inside and in the very back behind a metal partition I saw some old card boxes and a large size cottage cheese container along with some old letters. Idly I opened the card box and found inside 2 antique pocket watches. Excited I ran over to show my dad. Then I started to pull out the rest. The cottage cheese container was full of old gold jewelry, and watch chains. One of the chains has a beautiful old locket attached to it and when I opened it there was the most beautiful old portraits, trimmed on the top and bottom with tiny little bits of red velvet ribbon. Almost as if they'd been draped. Precious! By now there was a small crowd around me and they were making their own discoveries. A small leather change purse held old gold coins as well as a collection of memorial coins. One was big and German. The cottage cheese collection also produced a pair of wedding bands inscribed, AK to LA and vice versa. Very plain bands, very small fingers. So lots of family memento's, but there were also drawings done by kids, a title to a car, an old account book dated 1845, and some graduation announcements from the 70's. It was soo exciting to find it all!

I assumed right away that the owner had died and someone who didn't know had dropped off the old cabinet to get rid of it. I thought it would be an adventure tracking down the next of kin and surprising them with these family treasures. But my husband being the practical man he is looked first in the phone book. He found the owner's name, phone number, and local address immediately! He was living in a retirement home and although not home then, he was there when my dad stopped by the next day. Although he's REALLY old and didn't recognize much, he did know his father's (AK) pocket watches when he saw them! He couldn't believe that someone had found them and returned them to him. Good deed well done! I had planned on including photos of the items in this blog- but after we found out he was still alive it seemed like that might be an infringement. Still it is fun to tell about! I just think it's great that although sometimes the jobs God gives are hard, every once in a while he gives us a gift like this- a task that's just a complete joy!

I guess the wrap up to this is treasure lost and found. Someone donated their old art materials and it is a treasure trove of materials for me. Someone else lost a significant part of their past and was able through a donation to have it discovered and returned to them. Through the generosity of a lot of individuals who donated their junk, my father's garage sale made almost $3000. before expenses, for Habitat for Humanity. And I, because of my discovery of this hidden collection, had an experience I will treasure always! Plus lots and lots of good stuff!